So I thought this year I would do New Year's goals. I had something really clever to say here, but it seems to have escaped me (temporarily).
2009 was pretty good - both love and I got jobs. And we moved from the "student apartment" into a much much much MUCH better apartment. And we are saving and planning on a trip to South Africa or New Zealand sometime in the next year. And oh! We started exercising in May and haven't stopped yet, so that is a pretty nice achievement too. :)
One other side note - I got a new camera for Christmas!!! YAY!! We still want a DSLR but those are expensive so in the meantime Fishy got me a nice camera to replace the one that died. ^_^
Joint Goals:
1) Cook 1 meal/food item a month, translating the recipe to Afrikaans and speaking Afrikaans while cooking
2) Cook 1 male/food item every two months from a different country. Make them gluten-free.
3) Program together on a project for at least one hour a week (or do screencasts/tutorials/etc)
4) Yay, exercise!
5) 4 MAKE/Instructables/similar projects in the year
6) Arts!
7) Go places! Do things! Have fun!
Solo Goals:
1) Knitting. Lots of knitting.
2) Finish butterfly needlepoint already!
3) Make 1 card a month (or more)
4) Make 1 iris pattern for Mom per month (or more)
5) Daring Cooks/Daring Bakers
6) Make 1 new craft a month
7) Sewing! - soft circuits, dance costume, halloween costume, and random stuff!
8)
9)
10)
Yes, I know the last three are blank...but, I think that every year that New Year's resolutions should total 10 (aside from the fact that it is especially fitting this year, with it being 2010 and all :P), but I am not sure what the last three will be. Yet. =) Most of my longer-term goals are already listed in the 101 in 1001 post. So when I think of something else, I will add!
Happy New Year, world!
Monday, December 28, 2009
Wednesday, October 21, 2009
Sooooooooooooup
lol, "Suuuuuuuuuuuuuuuuuuuuuusan"
Yeah I watch too many kids movies. XD
Without Further Ado...
The October 2009 Daring Cooks’ challenge was brought to us by Jaden of the blog Steamy Kitchen. The recipes are from her new cookbook, The Steamy Kitchen Cookbook.
The challenge was Vietnamese Pho, and also Chocolate Wontons. I didn't want to make my own wonton wrappers for the dumplings (I can't eat normal wrappers :P) so I didn't do the dessert dumplings. Maybe the next time I make Chinese dumplings from scratch I will save some of the dough and try them, though...they did look yummy!
There were three variations of the soup: chicken, beef, or vegetarian. I went with the standard chicken, but I only used chicken broth and didn't add any chicken breast. Is it weird that I like chicken broth but hate chicken?
Unfortunately, I didn't end up with any pictures becauuuuuuuse....my camera is broken! D: It actually broke for real when I tried to take pictures for this challenge. And I want a really really good camera (read: Digital SLR) so I don't want to spend $100+ on a camera temporarily..but I might anyways because I don't know when I will actually be able to bring myself to spend $1000+. :\ Why does my stuff have to break? There is so much stuff I want/need and nearly all of it is over $1000!!!! But before I spend that much I need to save...enough to go to SA ($7000+) and enough to have a happy buffer (not sure how much that is...hm...) just in case.
Okay, moving on to the soup. I actually didn't modify the recipe much, aside from not putting in chicken breast.
Ingredients - Vietnamese Pho:
As usual, comments will appear in italics
For the Chicken Pho Broth:
2 tbsp. whole coriander seeds Biltong spice!
4 whole cloves
2 whole star anise
2 quarts (2 liters/8 cups/64 fluid ounces) store-bought or homemade chicken stock
1 whole chicken breast (bone in or boneless)Ew, chicken >.<
½ onion
1 3-inch (7.5 cm) chunk of ginger, sliced and smashed with side of knife
1 to 2 tbsps. sugar
1 to 2 tbsps. fish sauce
1 lb. (500 grams/16 ounces) dried rice noodles (about ¼ inch/6 mm wide)
Accompaniments:
2 cups (200 grams/7 ounces) bean sprouts, washed and tails pinched off
Fresh cilantro (coriander) tops (leaves and tender stems)
½ cup (50 grams/approx. 2 ounces) shaved red onions
½ lime, cut into 4 wedges
Sriracha chili sauce
Hoisin sauce
Sliced fresh chili peppers of your choice
Directions:
1.To make the Chicken Pho Broth: heat a frying pan over medium heat. Add the coriander seeds, cloves and star anise and toast until fragrant, about 3-4 minutes. Immediately spoon out the spices to avoid burning.
2.In a large pot, add all the ingredients (including the toasted spices) and bring to a boil.
3.Reduce the heat to medium-low and let simmer for 20 minutes, skimming the surface frequently.
4.Use tongs to remove the chicken breasts and shred the meat with your fingers, discarding the bone if you have used bone-in breasts.
5.Taste the broth and add more fish sauce or sugar, if needed. Strain the broth and discard the solids.
6.Prepare the noodles as per directions on the package.
7.Ladle the broth into bowls. Then divide the shredded chicken breast and the soft noodles evenly into each bowl.
8.Have the accompaniments spread out on the table. Each person can customize their own bowl with these ingredients.
Conclusion:
The end result was very good. I might make slight changes if I make it again, but it reminded me a lot of Thai food, actually. I've never had Vietnamese food before, so this was a fun challenge, and making the soup itself wasn't too difficult, or time consuming, which was nice. :) Since I have a job now and all!
Yeah I watch too many kids movies. XD
Without Further Ado...
The October 2009 Daring Cooks’ challenge was brought to us by Jaden of the blog Steamy Kitchen. The recipes are from her new cookbook, The Steamy Kitchen Cookbook.
The challenge was Vietnamese Pho, and also Chocolate Wontons. I didn't want to make my own wonton wrappers for the dumplings (I can't eat normal wrappers :P) so I didn't do the dessert dumplings. Maybe the next time I make Chinese dumplings from scratch I will save some of the dough and try them, though...they did look yummy!
There were three variations of the soup: chicken, beef, or vegetarian. I went with the standard chicken, but I only used chicken broth and didn't add any chicken breast. Is it weird that I like chicken broth but hate chicken?
Unfortunately, I didn't end up with any pictures becauuuuuuuse....my camera is broken! D: It actually broke for real when I tried to take pictures for this challenge. And I want a really really good camera (read: Digital SLR) so I don't want to spend $100+ on a camera temporarily..but I might anyways because I don't know when I will actually be able to bring myself to spend $1000+. :\ Why does my stuff have to break? There is so much stuff I want/need and nearly all of it is over $1000!!!! But before I spend that much I need to save...enough to go to SA ($7000+) and enough to have a happy buffer (not sure how much that is...hm...) just in case.
Okay, moving on to the soup. I actually didn't modify the recipe much, aside from not putting in chicken breast.
Ingredients - Vietnamese Pho:
As usual, comments will appear in italics
For the Chicken Pho Broth:
2 tbsp. whole coriander seeds Biltong spice!
4 whole cloves
2 whole star anise
2 quarts (2 liters/8 cups/64 fluid ounces) store-bought or homemade chicken stock
½ onion
1 3-inch (7.5 cm) chunk of ginger, sliced and smashed with side of knife
1 to 2 tbsps. sugar
1 to 2 tbsps. fish sauce
1 lb. (500 grams/16 ounces) dried rice noodles (about ¼ inch/6 mm wide)
Accompaniments:
2 cups (200 grams/7 ounces) bean sprouts, washed and tails pinched off
Fresh cilantro (coriander) tops (leaves and tender stems)
½ cup (50 grams/approx. 2 ounces) shaved red onions
½ lime, cut into 4 wedges
Sriracha chili sauce
Hoisin sauce
Sliced fresh chili peppers of your choice
Directions:
1.To make the Chicken Pho Broth: heat a frying pan over medium heat. Add the coriander seeds, cloves and star anise and toast until fragrant, about 3-4 minutes. Immediately spoon out the spices to avoid burning.
2.In a large pot, add all the ingredients (including the toasted spices) and bring to a boil.
3.Reduce the heat to medium-low and let simmer for 20 minutes, skimming the surface frequently.
4.Use tongs to remove the chicken breasts and shred the meat with your fingers, discarding the bone if you have used bone-in breasts.
5.Taste the broth and add more fish sauce or sugar, if needed. Strain the broth and discard the solids.
6.Prepare the noodles as per directions on the package.
7.Ladle the broth into bowls. Then divide the shredded chicken breast and the soft noodles evenly into each bowl.
8.Have the accompaniments spread out on the table. Each person can customize their own bowl with these ingredients.
Conclusion:
The end result was very good. I might make slight changes if I make it again, but it reminded me a lot of Thai food, actually. I've never had Vietnamese food before, so this was a fun challenge, and making the soup itself wasn't too difficult, or time consuming, which was nice. :) Since I have a job now and all!
Sunday, September 27, 2009
*puff*
Trying to come up with witty titles for this post...all I'm getting is stuff like "puff the magic dragon" or "huff and puff and bloooooooow your house down"...so...yeah. -_-
The September 2009 Daring Bakers' challenge was hosted by Steph of A Whisk and a Spoon. She chose the French treat, Vols-au-Vent based on the Puff Pastry recipe by Michel Richard from the cookbook Baking With Julia by Dorie Greenspan.
For those wondering, vols-au-vent translates loosely to "flys/flying in the wind". Which makes me think of wind kisses, which I now want to make, but I digress.
I only made a "normal" version of puff pastry. I am trying to lose weight and become more fit in general so I am trying to eat more healthily, and I am pretty sure that puff pastry falls under the category of "bad food". >.<
I have made puff pastry before, when I made croissants for French class in high school (it was "market day" :P and I was the only person who actually baked...but that is not unusual), so making the puff pastry wasn't terribly difficult. It was, however, rather time consuming.
Oh, and my lovely camera is kinda broke again (well, it breaks off-and-on so sometimes I can get one or two pictures, sometimes I can't get any...very annoying, I think I need to invest in a new one) so I don't have many pictures, and I don't know how good the pictures are because I was trying to take them before the camera died again, lol. Not conducive to artistic photography...not that I am ever very good at that. :\
I only made five vol-au-vent shells, and am saving (and freezing) the rest of the puff pastry to make pie shells for my husband...he really wants a pie with meat and vegetable stew in it. *shrug* And depending on how much dough I have left after that, I might make either croissants or general puffs to fill with custard or whatever...
I filled one of the vol-au-vent shells with strawberries and whipped cream, and the other four with tuna salad (Syd's request) for lunch today.
I don't really have a lot of comments on this challenge, it was fairly straight-forward. Beating butter with a rolling pin is kind of fun. ^_^
Without furthur ado, here is the recipe:
Vols-au-Vent
As usual, annotations, if any, are in italics
Forming and Baking the Vols-au-Vent
Yield: 1/3 of the puff pastry recipe below will yield about 8-10 1.5” vols-au-vent or 4 4” vols-au-vent
In addition to the equipment listed above, you will need:
-well-chilled puff pastry dough (recipe below)
-egg wash (1 egg or yolk beaten with a small amount of water)
-your filling of choice I used strawberries and whipped cream, and tuna salad
Line a baking sheet with parchment and set aside. Yay, I don't have to ruin my new tray! I <3 parchment paper!
Using a knife or metal bench scraper, divided your chilled puff pastry dough into three equal pieces. Work with one piece of the dough, and leave the rest wrapped and chilled.
On a lightly floured surface, roll the piece of dough into a rectangle about 1/8 to 1/4-inch (3-6 mm) thick. Transfer it to the baking sheet and refrigerate for about 10 minutes before proceeding with the cutting.
(This assumes you will be using round cutters, but if you do not have them, it is possible to cut square vols-au-vents using a sharp chef’s knife.) For smaller, hors d'oeuvre sized vols-au-vent, use a 1.5” round cutter to cut out 8-10 circles. For larger sized vols-au-vent, fit for a main course or dessert, use a 4” cutter to cut out about 4 circles. Make clean, sharp cuts and try not to twist your cutters back and forth or drag your knife through the dough. Half of these rounds will be for the bases, and the other half will be for the sides. (Save any scrap by stacking—not wadding up—the pieces…they can be re-rolled and used if you need extra dough. If you do need to re-roll scrap to get enough disks, be sure to use any rounds cut from it for the bases, not the ring-shaped sides.)
Using a ¾-inch cutter for small vols-au-vent, or a 2- to 2.5-inch round cutter for large, cut centers from half of the rounds to make rings. These rings will become the sides of the vols-au-vent, while the solid disks will be the bottoms. You can either save the center cut-outs to bake off as little “caps” for you vols-au-vent, or put them in the scrap pile. The caps are so cute!
Dock the solid bottom rounds with a fork (prick them lightly, making sure not to go all the way through the pastry) and lightly brush them with egg wash. Place the rings directly on top of the bottom rounds and very lightly press them to adhere. Brush the top rings lightly with egg wash, trying not to drip any down the sides (which may inhibit rise).This is difficult If you are using the little “caps,” dock and egg wash them as well.
Refrigerate the assembled vols-au-vent on the lined baking sheet while you pre-heat the oven to 400ºF (200ºC). (You could also cover and refrigerate them for a few hours at this point.)
Once the oven is heated, remove the sheet from the refrigerator and placea silicon baking mat (preferred because of its weight) or another sheet of parchment over top of the shells. This will help them rise evenly. Bake the shells until they have risen and begin to brown, about 10-15 minutes depending on their size. Reduce the oven temperature to 350ºF (180ºC), and remove the silicon mat or parchment sheet from the top of the vols-au-vent. If the centers have risen up inside the vols-au-vent, you can gently press them down. I did poke the centers down, once in the oven and once after they were completely done. Continue baking (with no sheet on top) until the layers are golden, about 15-20 minutes more. (If you are baking the center “caps” they will likely be finished well ahead of the shells, so keep an eye on them and remove them from the oven when browned.)
Remove to a rack to cool. Cool to room temperature for cold fillings or to warm for hot fillings.
Fill and serve.
*For additional rise on the larger-sized vols-au-vents, you can stack one or two additional ring layers on top of each other (using egg wash to "glue"). This will give higher sides to larger vols-au-vents, but is not advisable for the smaller ones, whose bases may not be large enough to support the extra weight. I only did one layer...
*Although they are at their best filled and eaten soon after baking, baked vols-au-vent shells can be stored airtight for a day.
*Shaped, unbaked vols-au-vent can be wrapped and frozen for up to a month (bake from frozen, egg-washing them first).
Michel Richard’s Puff Pastry Dough
From: Baking with Julia by Dorie Greenspan
Yield: 2-1/2 pounds dough I only made a half recipe, because I didn't have that much all-purpose flour...and because Syd is the only one who can eat the dough, so I will have to make my own for the meat pies
Ingredients:
2-1/2 cups (12.2 oz/ 354 g) unbleached all-purpose flour
1-1/4 cups (5.0 oz/ 142 g) cake flour
1 tbsp. salt (you can cut this by half for a less salty dough or for sweet preparations)
1-1/4 cups (10 fl oz/ 300 ml) ice water
1 pound (16 oz/ 454 g) very cold unsalted butter
plus extra flour for dusting work surface
Mixing the Dough:
Check the capacity of your food processor before you start. If it cannot hold the full quantity of ingredients, make the dough into two batches and combine them. I do not have a food processor, I mixed by hand. It was fine, if a bit cold from the ice water!
Put the all-purpose flour, cake flour, and salt in the work bowl of a food processor fitted with a metal blade and pulse a couple of times just to mix. Add the water all at once, pulsing until the dough forms a ball on the blade. The dough will be very moist and pliable and will hold together when squeezed between your fingers. (Actually, it will feel like Play-Doh.)
Remove the dough from the machine, form it into a ball, with a small sharp knife, slash the top in a tic-tac-toe pattern. Wrap the dough in a damp towel and refrigerate for about 5 minutes.
Meanwhile, place the butter between 2 sheets of plastic wrap and beat it with a rolling pin until it flattens into a square that's about 1" thick. This was fun! Take care that the butter remains cool and firm: if it has softened or become oily, chill it before continuing.
Incorporating the Butter:
Unwrap the dough and place it on a work surface dusted with all-purpose flour (A cool piece of marble is the ideal surface for puff pastry) with your rolling pin (preferably a French rolling pin without handles which I don't have, so I used a normal rolling pin...it was fine), press on the dough to flatten it and then roll it into a 10" square. Keep the top and bottom of the dough well floured to prevent sticking and lift the dough and move it around frequently. Starting from the center of the square, roll out over each corner to create a thick center pad with "ears," or flaps.
Place the cold butter in the middle of the dough and fold the ears over the butter, stretching them as needed so that they overlap slightly and encase the butter completely. (If you have to stretch the dough, stretch it from all over; don't just pull the ends) you should now have a package that is 8" square.
To make great puff pastry, it is important to keep the dough cold at all times. There are specified times for chilling the dough, but if your room is warm, or you work slowly, or you find that for no particular reason the butter starts to ooze out of the pastry, cover the dough with plastic wrap and refrigerate it . You can stop at any point in the process and continue at your convenience or when the dough is properly chilled.
Making the Turns:
Gently but firmly press the rolling pin against the top and bottom edges of the square (this will help keep it square). Then, keeping the work surface and the top of the dough well floured to prevent sticking, roll the dough into a rectangle that is three times as long as the square you started with, about 24" (don't worry about the width of the rectangle: if you get the 24", everything else will work itself out.) With this first roll, it is particularly important that the butter be rolled evenly along the length and width of the rectangle; check when you start rolling that the butter is moving along well, and roll a bit harder or more evenly, if necessary, to get a smooth, even dough-butter sandwich (use your arm-strength! I did not have any problems with this being difficult to do, although I have been weight lifting, my arms have always been weak. Trying to change that, though. Maybe it is working? ).
With a pastry brush, brush off the excess flour from the top of the dough, and fold the rectangle up from the bottom and down from the top in thirds, like a business letter, brushing off the excess flour. You have completed one turn.
Rotate the dough so that the closed fold is to your left, like the spine of a book. Repeat the rolling and folding process, rolling the dough to a length of 24" and then folding it in thirds. This is the second turn.
Chilling the Dough:
If the dough is still cool and no butter is oozing out, you can give the dough another two turns now. If the condition of the dough is iffy, wrap it in plastic wrap and refrigerate it for at least 30 minutes. Each time you refrigerate the dough, mark the number of turns you've completed by indenting the dough with your fingertips. It is best to refrigerate the dough for 30 to 60 minutes between each set of two turns.
The total number of turns needed is six. If you prefer, you can give the dough just four turns now, chill it overnight, and do the last two turns the next day. Puff pastry is extremely flexible in this regard. However, no matter how you arrange your schedule, you should plan to chill the dough for at least an hour before cutting or shaping it.
Final Conclusion:
Well, Syd really liked the puff pastry, he thought that turned out really well. I thought it looked like it turned out well, but I obviously can't actually try it. *shrug*
I think these would be good with chocolate or pumpkin mousse. But I still can't eat them so...whatever.
The September 2009 Daring Bakers' challenge was hosted by Steph of A Whisk and a Spoon. She chose the French treat, Vols-au-Vent based on the Puff Pastry recipe by Michel Richard from the cookbook Baking With Julia by Dorie Greenspan.
For those wondering, vols-au-vent translates loosely to "flys/flying in the wind". Which makes me think of wind kisses, which I now want to make, but I digress.
I only made a "normal" version of puff pastry. I am trying to lose weight and become more fit in general so I am trying to eat more healthily, and I am pretty sure that puff pastry falls under the category of "bad food". >.<
I have made puff pastry before, when I made croissants for French class in high school (it was "market day" :P and I was the only person who actually baked...but that is not unusual), so making the puff pastry wasn't terribly difficult. It was, however, rather time consuming.
Oh, and my lovely camera is kinda broke again (well, it breaks off-and-on so sometimes I can get one or two pictures, sometimes I can't get any...very annoying, I think I need to invest in a new one) so I don't have many pictures, and I don't know how good the pictures are because I was trying to take them before the camera died again, lol. Not conducive to artistic photography...not that I am ever very good at that. :\
I only made five vol-au-vent shells, and am saving (and freezing) the rest of the puff pastry to make pie shells for my husband...he really wants a pie with meat and vegetable stew in it. *shrug* And depending on how much dough I have left after that, I might make either croissants or general puffs to fill with custard or whatever...
I filled one of the vol-au-vent shells with strawberries and whipped cream, and the other four with tuna salad (Syd's request) for lunch today.
I don't really have a lot of comments on this challenge, it was fairly straight-forward. Beating butter with a rolling pin is kind of fun. ^_^
Without furthur ado, here is the recipe:
Vols-au-Vent
As usual, annotations, if any, are in italics
Forming and Baking the Vols-au-Vent
Yield: 1/3 of the puff pastry recipe below will yield about 8-10 1.5” vols-au-vent or 4 4” vols-au-vent
In addition to the equipment listed above, you will need:
-well-chilled puff pastry dough (recipe below)
-egg wash (1 egg or yolk beaten with a small amount of water)
-your filling of choice I used strawberries and whipped cream, and tuna salad
Line a baking sheet with parchment and set aside. Yay, I don't have to ruin my new tray! I <3 parchment paper!
Using a knife or metal bench scraper, divided your chilled puff pastry dough into three equal pieces. Work with one piece of the dough, and leave the rest wrapped and chilled.
On a lightly floured surface, roll the piece of dough into a rectangle about 1/8 to 1/4-inch (3-6 mm) thick. Transfer it to the baking sheet and refrigerate for about 10 minutes before proceeding with the cutting.
(This assumes you will be using round cutters, but if you do not have them, it is possible to cut square vols-au-vents using a sharp chef’s knife.) For smaller, hors d'oeuvre sized vols-au-vent, use a 1.5” round cutter to cut out 8-10 circles. For larger sized vols-au-vent, fit for a main course or dessert, use a 4” cutter to cut out about 4 circles. Make clean, sharp cuts and try not to twist your cutters back and forth or drag your knife through the dough. Half of these rounds will be for the bases, and the other half will be for the sides. (Save any scrap by stacking—not wadding up—the pieces…they can be re-rolled and used if you need extra dough. If you do need to re-roll scrap to get enough disks, be sure to use any rounds cut from it for the bases, not the ring-shaped sides.)
Using a ¾-inch cutter for small vols-au-vent, or a 2- to 2.5-inch round cutter for large, cut centers from half of the rounds to make rings. These rings will become the sides of the vols-au-vent, while the solid disks will be the bottoms. You can either save the center cut-outs to bake off as little “caps” for you vols-au-vent, or put them in the scrap pile. The caps are so cute!
Dock the solid bottom rounds with a fork (prick them lightly, making sure not to go all the way through the pastry) and lightly brush them with egg wash. Place the rings directly on top of the bottom rounds and very lightly press them to adhere. Brush the top rings lightly with egg wash, trying not to drip any down the sides (which may inhibit rise).This is difficult If you are using the little “caps,” dock and egg wash them as well.
Refrigerate the assembled vols-au-vent on the lined baking sheet while you pre-heat the oven to 400ºF (200ºC). (You could also cover and refrigerate them for a few hours at this point.)
Once the oven is heated, remove the sheet from the refrigerator and place
Remove to a rack to cool. Cool to room temperature for cold fillings or to warm for hot fillings.
Fill and serve.
*For additional rise on the larger-sized vols-au-vents, you can stack one or two additional ring layers on top of each other (using egg wash to "glue"). This will give higher sides to larger vols-au-vents, but is not advisable for the smaller ones, whose bases may not be large enough to support the extra weight. I only did one layer...
*Although they are at their best filled and eaten soon after baking, baked vols-au-vent shells can be stored airtight for a day.
*Shaped, unbaked vols-au-vent can be wrapped and frozen for up to a month (bake from frozen, egg-washing them first).
Michel Richard’s Puff Pastry Dough
From: Baking with Julia by Dorie Greenspan
Yield: 2-1/2 pounds dough I only made a half recipe, because I didn't have that much all-purpose flour...and because Syd is the only one who can eat the dough, so I will have to make my own for the meat pies
Ingredients:
2-1/2 cups (12.2 oz/ 354 g) unbleached all-purpose flour
1-1/4 cups (5.0 oz/ 142 g) cake flour
1 tbsp. salt (you can cut this by half for a less salty dough or for sweet preparations)
1-1/4 cups (10 fl oz/ 300 ml) ice water
1 pound (16 oz/ 454 g) very cold unsalted butter
plus extra flour for dusting work surface
Mixing the Dough:
Put the all-purpose flour, cake flour, and salt in the work bowl of a food processor fitted with a metal blade and pulse a couple of times just to mix. Add the water all at once, pulsing until the dough forms a ball on the blade. The dough will be very moist and pliable and will hold together when squeezed between your fingers. (Actually, it will feel like Play-Doh.)
Remove the dough from the machine, form it into a ball, with a small sharp knife, slash the top in a tic-tac-toe pattern. Wrap the dough in a damp towel and refrigerate for about 5 minutes.
Meanwhile, place the butter between 2 sheets of plastic wrap and beat it with a rolling pin until it flattens into a square that's about 1" thick. This was fun! Take care that the butter remains cool and firm: if it has softened or become oily, chill it before continuing.
Incorporating the Butter:
Unwrap the dough and place it on a work surface dusted with all-purpose flour (A cool piece of marble is the ideal surface for puff pastry) with your rolling pin (preferably a French rolling pin without handles which I don't have, so I used a normal rolling pin...it was fine), press on the dough to flatten it and then roll it into a 10" square. Keep the top and bottom of the dough well floured to prevent sticking and lift the dough and move it around frequently. Starting from the center of the square, roll out over each corner to create a thick center pad with "ears," or flaps.
Place the cold butter in the middle of the dough and fold the ears over the butter, stretching them as needed so that they overlap slightly and encase the butter completely. (If you have to stretch the dough, stretch it from all over; don't just pull the ends) you should now have a package that is 8" square.
To make great puff pastry, it is important to keep the dough cold at all times. There are specified times for chilling the dough, but if your room is warm, or you work slowly, or you find that for no particular reason the butter starts to ooze out of the pastry, cover the dough with plastic wrap and refrigerate it . You can stop at any point in the process and continue at your convenience or when the dough is properly chilled.
Making the Turns:
Gently but firmly press the rolling pin against the top and bottom edges of the square (this will help keep it square). Then, keeping the work surface and the top of the dough well floured to prevent sticking, roll the dough into a rectangle that is three times as long as the square you started with, about 24" (don't worry about the width of the rectangle: if you get the 24", everything else will work itself out.) With this first roll, it is particularly important that the butter be rolled evenly along the length and width of the rectangle; check when you start rolling that the butter is moving along well, and roll a bit harder or more evenly, if necessary, to get a smooth, even dough-butter sandwich (use your arm-strength! I did not have any problems with this being difficult to do, although I have been weight lifting, my arms have always been weak. Trying to change that, though. Maybe it is working? ).
With a pastry brush, brush off the excess flour from the top of the dough, and fold the rectangle up from the bottom and down from the top in thirds, like a business letter, brushing off the excess flour. You have completed one turn.
Rotate the dough so that the closed fold is to your left, like the spine of a book. Repeat the rolling and folding process, rolling the dough to a length of 24" and then folding it in thirds. This is the second turn.
Chilling the Dough:
If the dough is still cool and no butter is oozing out, you can give the dough another two turns now. If the condition of the dough is iffy, wrap it in plastic wrap and refrigerate it for at least 30 minutes. Each time you refrigerate the dough, mark the number of turns you've completed by indenting the dough with your fingertips. It is best to refrigerate the dough for 30 to 60 minutes between each set of two turns.
The total number of turns needed is six. If you prefer, you can give the dough just four turns now, chill it overnight, and do the last two turns the next day. Puff pastry is extremely flexible in this regard. However, no matter how you arrange your schedule, you should plan to chill the dough for at least an hour before cutting or shaping it.
Final Conclusion:
Well, Syd really liked the puff pastry, he thought that turned out really well. I thought it looked like it turned out well, but I obviously can't actually try it. *shrug*
I think these would be good with chocolate or pumpkin mousse. But I still can't eat them so...whatever.
Friday, August 28, 2009
The fatest cake you will ever eat?
The August 2009 Daring Bakers' challenge was hosted by Angela of A Spoonful of Sugar and Lorraine of Not Quite Nigella. They chose the spectacular Dobos Torte based on a recipe from Rick Rodgers' cookbook Kaffeehaus: Exquisite Desserts from the Classic Caffés of Vienna, Budapest, and Prague.
Since there was no way Syd and I were eating this on our own (and I don't even think I want to make a gf-version for me...but we will see), I decided to make a half recipe, even though we are maybe going to share this with a couple of friends for a (belated) birthday. Although birthday girl's husband is kind of being a jerk at the moment, so...maybe not. He is not deserving of cake. He is more deserving of a good punch in the nose. :3
I haven't changed this recipe much (shocking!). The cake layers themselves aren't terribly fattening, it is mostly the buttercream frosting that does it. :P Although there is rather a lot of sugar as well.
So, a Dobos Torte is a tart/cake/torte that originated in Hungary. It consists of three essential parts:
multiple layers (5 here, but can be more) of sponge cake,
 Sponge cake layers
(dark) chocolate buttercream icing,
 Chocolate buttercream
and caramel wedges on top.
 Caramel covered sponge cake wedges
I beat the eggs for the recommended amount of time, and they seemed to come out better than some of the other eggs that I have beaten previously.
 Egg whites and yolks mixed, before adding the flour
I kind of estimated the amount of batter to use for each layer, so I hope my layers are thick enough. They didn't burn or anything, and they look good. They also smell good. Too bad I can't eat them. :(
 Batter spread in circles...it was hard to get an even thickness
I grated my chocolate instead of chopped it. I used half a baker's chocolate bar leftover from making ystervarkkies.
 Finely ground chocolate, castor sugar all measured out
I think I may have over cooked the carmel juuuuuuuuust a bit, ooops. I was doing laundry. ^^' I should not mutlitask while daring kitchening!
Icing the cake was the fun part!
 You can see the layers!
And the finished cake! It was kind of hard to get the wedges to stand up and look nice without nuts underneath propping them up. Oh well, I still think the final effect is nice.
 It looks good enough to eat! ^_^ ...I hope
I'll post pics of the insides of the cake once I see them. :P
Here is the Recipe: My notes are in italics
Dobos Torte
Equipment
•2 baking sheets I did this with only one..
•9” (23cm) springform tin and 8” cake tin, for templates I made a template out of paper myself, and traced it onto the parchment paper and waxed paper...
•mixing bowls (1 medium, 1 large)
•a sieve
•a double boiler
•a small saucepan
•a whisk (you could use a balloon whisk for the entire cake, but an electric hand whisk or stand mixer will make life much easier)
•metal offset spatula
•sharp knife
•a 7 1/2” cardboard cake round, or just build cake on the base of a sprinfrom tin. Making my own
•piping bag and tip, optional
Prep times
•Sponge layers 20 mins prep, 40 mins cooking total if baking each layer individually.
•Buttercream: 20 mins cooking. Cooling time for buttercream: about 1 hour plus 10 minutes after this to beat and divide.
•Caramel layer: 10-15 minutes.
•Assembly of whole cake: 20 minutes
Sponge cake layers
I made half a recipe..
•6 large eggs, separated, at room temperature
•1 1/3 cups (162g) confectioner's (icing) sugar, divided
•1 teaspoon (5ml) vanilla extract
•1 cup plus 2 tablespoons (112g) sifted cake flour (SUBSTITUTE 95g plain flour + 17g cornflour (cornstarch) sifted together)
•pinch of salt
Chocolate Buttercream
also half a recipe
•4 large eggs, at room temperature
•1 cup (200g) caster (ultrafine or superfine white) sugar
•4oz (110g) bakers chocolate or your favourite dark chocolate, finely chopped
•2 sticks plus 2 tablespoons (250g) unsalted butter, at room temperature.
Caramel topping
Halved this one as well...are we seeing a pattern here? :P
•1 cup (200g) caster (superfine or ultrafine white) sugar I found this as Superfine Baker's Sugar
•12 tablespoons (180 ml) water
•8 teaspoons (40 ml) lemon juice
•1 tablespoon neutral oil (e.g. grapeseed, rice bran, sunflower)
Finishing touches
•a 7” cardboard round Making this myself, couldn't find a 4" round :P
•12 whole hazelnuts, peeled and toastedNo nuts in my house!!!
•½ cup (50g) peeled and finely chopped hazelnutsNo nuts
Directions for the sponge layers:
NB. The sponge layers can be prepared in advance and stored interleaved with parchment and well-wrapped in the fridge overnight.
1.Position the racks in the top and centre thirds of the oven and heat to 400F (200C).
2.Cut six pieces of parchment paper to fit the baking sheets. Using the bottom of a 9" (23cm) springform tin as a template and a dark pencil or a pen, trace a circle on each of the papers, and turn them over (the circle should be visible from the other side, so that the graphite or ink doesn't touch the cake batter.)
3.Beat the egg yolks, 2/3 cup (81g) of the confectioner's (icing) sugar, and the vanilla in a medium bowl with a mixer on high speed until the mixture is thick, pale yellow and forms a thick ribbon when the beaters are lifted a few inches above the batter, about 3 minutes. (You can do this step with a balloon whisk if you don't have a mixer.)
4.In another bowl, using clean beaters, beat the egg whites until soft peaks form. Gradually beat in the remaining 2/3 cup (81g) of confectioner's (icing)sugar until the whites form stiff, shiny peaks. Using a large rubber spatula, stir about 1/4 of the beaten whites into the egg yolk mixture, then fold in the remainder, leaving a few wisps of white visible. Combine the flour and salt. Sift half the flour over the eggs, and fold in; repeat with the remaining flour.
5.Line one of the baking sheets with a circle-marked paper. Using a small offset spatula, spread about 3/4cup of the batter in an even layer, filling in the traced circle on one baking sheet. Bake on the top rack for 5 minutes, until the cake springs back when pressed gently in the centre and the edges are lightly browned. While this cake bakes, repeat the process on the other baking sheet, placing it on the centre rack. When the first cake is done, move the second cake to the top rack. Invert the first cake onto a flat surface and carefully peel off the paper. Slide the cake layer back onto the paper and let stand until cool. Rinse the baking sheet under cold running water to cool, and dry it before lining with another parchment. Continue with the remaining papers and batter to make a total of six layers. Completely cool the layers. Using an 8" springform pan bottom or plate as a template, trim each cake layer into a neat round. (A small serrated knife is best for this task.)
Directions for the chocolate buttercream:
NB. This can be prepared in advance and kept chilled until required.
1.Prepare a double-boiler: quarter-fill a large saucepan with water and bring it to a boil.
2.Meanwhile, whisk the eggs with the sugar until pale and thickened, about five minutes. You can use a balloon whisk or electric hand mixer for this.
3.Fit bowl over the boiling water in the saucepan (water should not touch bowl) and lower the heat to a brisk simmer. Cook the egg mixture, whisking constantly, for 2-3 minutes until you see it starting to thicken a bit. Whisk in the finely chopped chocolate and cook, stirring, for a further 2-3 minutes.
4.Scrape the chocolate mixture into a medium bowl and leave to cool to room temperature. It should be quite thick and sticky in consistency.
5.When cool, beat in the soft butter, a small piece (about 2 tablespoons/30g) at a time. An electric hand mixer is great here, but it is possible to beat the butter in with a spatula if it is soft enough. You should end up with a thick, velvety chocolate buttercream. Chill while you make the caramel topping.
Directions for the caramel topping:
1.Choose the best-looking cake layer for the caramel top. To make the caramel topping: Line a jellyroll pan with parchment paper and butter the paper. Place the reserved cake layer on the paper. Score the cake into 12 equal wedges. Lightly oil a thin, sharp knife and an offset metal spatula.
2.Stir the sugar, water and lemon juice in a small saucepan. Bring to a boil over a medium heat, stirring often to dissolve the sugar. Once dissolved into a smooth syrup, turn the heat up to high and boil without stirring, swirling the pan by the handle occasionally and washing down any sugar crystals on the sides of the pan with a wet brush until the syrup has turned into an amber-coloured caramel.
3.The top layer is perhaps the hardest part of the whole cake so make sure you have a oiled, hot offset spatula ready. I also find it helps if the cake layer hasn't just been taken out of the refrigerator. I made mine ahead of time and the cake layer was cold and the toffee set very, very quickly—too quickly for me to spread it. Immediately pour all of the hot caramel over the cake layer. You will have some leftover most probably but more is better than less and you can always make nice toffee pattern using the extra to decorate. Using the offset spatula, quickly spread the caramel evenly to the edge of the cake layer. Let cool until beginning to set, about 30 seconds. Using the tip of the hot oiled knife (keep re-oiling this with a pastry brush between cutting), cut through the scored marks to divide the caramel layer into 12 equal wedges. Cool another minute or so, then use the edge of the knife to completely cut and separate the wedges using one firm slice movement (rather than rocking back and forth which may produce toffee strands). Cool completely.
Assembling the Dobos
1.Divide the buttercream into six equal parts.
2.Place a dab of chocolate buttercream on the middle of a 7 1/2” cardboard round and top with one cake layer. Spread the layer with one part of the chocolate icing. Repeat with 4 more cake layers. Spread the remaining icing on the sides of the cake.
3.Optional: press the finely chopped hazelnuts onto the sides of the cake.
4.Propping a hazelnut under each wedge so that it sits at an angle, arrange the wedges on top of the cake in a spoke pattern. If you have any leftover buttercream, you can pipe rosettes under each hazelnut or a large rosette in the centre of the cake. Refrigerate the cake under a cake dome until the icing is set, about 2 hours. Let slices come to room temperature for the best possible flavour.
End Notes:
While a bit time consuming, this wasn't terribly difficult, but it looks impressive. I have no idea how it tastes, however!
I will add a review here once we have had the cake with the birthday girl and people...either tonight or tomorrow night. Yep.
That was fun! ^_^
Since there was no way Syd and I were eating this on our own (and I don't even think I want to make a gf-version for me...but we will see), I decided to make a half recipe, even though we are maybe going to share this with a couple of friends for a (belated) birthday. Although birthday girl's husband is kind of being a jerk at the moment, so...maybe not. He is not deserving of cake. He is more deserving of a good punch in the nose. :3
I haven't changed this recipe much (shocking!). The cake layers themselves aren't terribly fattening, it is mostly the buttercream frosting that does it. :P Although there is rather a lot of sugar as well.
So, a Dobos Torte is a tart/cake/torte that originated in Hungary. It consists of three essential parts:
multiple layers (5 here, but can be more) of sponge cake,
 Sponge cake layers
(dark) chocolate buttercream icing,
 Chocolate buttercream
and caramel wedges on top.
 Caramel covered sponge cake wedges
I beat the eggs for the recommended amount of time, and they seemed to come out better than some of the other eggs that I have beaten previously.
 Egg whites and yolks mixed, before adding the flour
I kind of estimated the amount of batter to use for each layer, so I hope my layers are thick enough. They didn't burn or anything, and they look good. They also smell good. Too bad I can't eat them. :(
 Batter spread in circles...it was hard to get an even thickness
I grated my chocolate instead of chopped it. I used half a baker's chocolate bar leftover from making ystervarkkies.
 Finely ground chocolate, castor sugar all measured out
I think I may have over cooked the carmel juuuuuuuuust a bit, ooops. I was doing laundry. ^^' I should not mutlitask while daring kitchening!
Icing the cake was the fun part!
 You can see the layers!
And the finished cake! It was kind of hard to get the wedges to stand up and look nice without nuts underneath propping them up. Oh well, I still think the final effect is nice.
 It looks good enough to eat! ^_^ ...I hope
I'll post pics of the insides of the cake once I see them. :P
Here is the Recipe: My notes are in italics
Dobos Torte
Equipment
•2 baking sheets I did this with only one..
•9” (23cm) springform tin and 8” cake tin, for templates I made a template out of paper myself, and traced it onto the parchment paper and waxed paper...
•mixing bowls (1 medium, 1 large)
•a sieve
•a double boiler
•a small saucepan
•a whisk (you could use a balloon whisk for the entire cake, but an electric hand whisk or stand mixer will make life much easier)
•metal offset spatula
•sharp knife
•a 7 1/2” cardboard cake round, or just build cake on the base of a sprinfrom tin. Making my own
•piping bag and tip, optional
Prep times
•Sponge layers 20 mins prep, 40 mins cooking total if baking each layer individually.
•Buttercream: 20 mins cooking. Cooling time for buttercream: about 1 hour plus 10 minutes after this to beat and divide.
•Caramel layer: 10-15 minutes.
•Assembly of whole cake: 20 minutes
Sponge cake layers
I made half a recipe..
•6 large eggs, separated, at room temperature
•1 1/3 cups (162g) confectioner's (icing) sugar, divided
•1 teaspoon (5ml) vanilla extract
•1 cup plus 2 tablespoons (112g) sifted cake flour (SUBSTITUTE 95g plain flour + 17g cornflour (cornstarch) sifted together)
•pinch of salt
Chocolate Buttercream
also half a recipe
•4 large eggs, at room temperature
•1 cup (200g) caster (ultrafine or superfine white) sugar
•4oz (110g) bakers chocolate or your favourite dark chocolate, finely chopped
•2 sticks plus 2 tablespoons (250g) unsalted butter, at room temperature.
Caramel topping
Halved this one as well...are we seeing a pattern here? :P
•1 cup (200g) caster (superfine or ultrafine white) sugar I found this as Superfine Baker's Sugar
•12 tablespoons (180 ml) water
•8 teaspoons (40 ml) lemon juice
•1 tablespoon neutral oil (e.g. grapeseed, rice bran, sunflower)
Finishing touches
•a 7” cardboard round Making this myself, couldn't find a 4" round :P
Directions for the sponge layers:
NB. The sponge layers can be prepared in advance and stored interleaved with parchment and well-wrapped in the fridge overnight.
1.Position the racks in the top and centre thirds of the oven and heat to 400F (200C).
2.Cut six pieces of parchment paper to fit the baking sheets. Using the bottom of a 9" (23cm) springform tin as a template and a dark pencil or a pen, trace a circle on each of the papers, and turn them over (the circle should be visible from the other side, so that the graphite or ink doesn't touch the cake batter.)
3.Beat the egg yolks, 2/3 cup (81g) of the confectioner's (icing) sugar, and the vanilla in a medium bowl with a mixer on high speed until the mixture is thick, pale yellow and forms a thick ribbon when the beaters are lifted a few inches above the batter, about 3 minutes. (You can do this step with a balloon whisk if you don't have a mixer.)
4.In another bowl, using clean beaters, beat the egg whites until soft peaks form. Gradually beat in the remaining 2/3 cup (81g) of confectioner's (icing)sugar until the whites form stiff, shiny peaks. Using a large rubber spatula, stir about 1/4 of the beaten whites into the egg yolk mixture, then fold in the remainder, leaving a few wisps of white visible. Combine the flour and salt. Sift half the flour over the eggs, and fold in; repeat with the remaining flour.
5.Line one of the baking sheets with a circle-marked paper. Using a small offset spatula, spread about 3/4cup of the batter in an even layer, filling in the traced circle on one baking sheet. Bake on the top rack for 5 minutes, until the cake springs back when pressed gently in the centre and the edges are lightly browned. While this cake bakes, repeat the process on the other baking sheet, placing it on the centre rack. When the first cake is done, move the second cake to the top rack. Invert the first cake onto a flat surface and carefully peel off the paper. Slide the cake layer back onto the paper and let stand until cool. Rinse the baking sheet under cold running water to cool, and dry it before lining with another parchment. Continue with the remaining papers and batter to make a total of six layers. Completely cool the layers. Using an 8" springform pan bottom or plate as a template, trim each cake layer into a neat round. (A small serrated knife is best for this task.)
Directions for the chocolate buttercream:
NB. This can be prepared in advance and kept chilled until required.
1.Prepare a double-boiler: quarter-fill a large saucepan with water and bring it to a boil.
2.Meanwhile, whisk the eggs with the sugar until pale and thickened, about five minutes. You can use a balloon whisk or electric hand mixer for this.
3.Fit bowl over the boiling water in the saucepan (water should not touch bowl) and lower the heat to a brisk simmer. Cook the egg mixture, whisking constantly, for 2-3 minutes until you see it starting to thicken a bit. Whisk in the finely chopped chocolate and cook, stirring, for a further 2-3 minutes.
4.Scrape the chocolate mixture into a medium bowl and leave to cool to room temperature. It should be quite thick and sticky in consistency.
5.When cool, beat in the soft butter, a small piece (about 2 tablespoons/30g) at a time. An electric hand mixer is great here, but it is possible to beat the butter in with a spatula if it is soft enough. You should end up with a thick, velvety chocolate buttercream. Chill while you make the caramel topping.
Directions for the caramel topping:
1.Choose the best-looking cake layer for the caramel top. To make the caramel topping: Line a jellyroll pan with parchment paper and butter the paper. Place the reserved cake layer on the paper. Score the cake into 12 equal wedges. Lightly oil a thin, sharp knife and an offset metal spatula.
2.Stir the sugar, water and lemon juice in a small saucepan. Bring to a boil over a medium heat, stirring often to dissolve the sugar. Once dissolved into a smooth syrup, turn the heat up to high and boil without stirring, swirling the pan by the handle occasionally and washing down any sugar crystals on the sides of the pan with a wet brush until the syrup has turned into an amber-coloured caramel.
3.The top layer is perhaps the hardest part of the whole cake so make sure you have a oiled, hot offset spatula ready. I also find it helps if the cake layer hasn't just been taken out of the refrigerator. I made mine ahead of time and the cake layer was cold and the toffee set very, very quickly—too quickly for me to spread it. Immediately pour all of the hot caramel over the cake layer. You will have some leftover most probably but more is better than less and you can always make nice toffee pattern using the extra to decorate. Using the offset spatula, quickly spread the caramel evenly to the edge of the cake layer. Let cool until beginning to set, about 30 seconds. Using the tip of the hot oiled knife (keep re-oiling this with a pastry brush between cutting), cut through the scored marks to divide the caramel layer into 12 equal wedges. Cool another minute or so, then use the edge of the knife to completely cut and separate the wedges using one firm slice movement (rather than rocking back and forth which may produce toffee strands). Cool completely.
Assembling the Dobos
1.Divide the buttercream into six equal parts.
2.Place a dab of chocolate buttercream on the middle of a 7 1/2” cardboard round and top with one cake layer. Spread the layer with one part of the chocolate icing. Repeat with 4 more cake layers. Spread the remaining icing on the sides of the cake.
4.
End Notes:
While a bit time consuming, this wasn't terribly difficult, but it looks impressive. I have no idea how it tastes, however!
I will add a review here once we have had the cake with the birthday girl and people...either tonight or tomorrow night. Yep.
That was fun! ^_^
Monday, August 24, 2009
I really need to be better at updating ._.
I updated my 101 in 1001 list, finally. I had been slacking in updating (and in posting about what I have done, as well!).
We took my Dad up to the Neil Armstrong Museum for his birthday, one of the places on our list, so I can check off one of the "visit 10 places in Ohio"...next stop: who knows? Maybe someplace over labor day weekend.
Also, I am in the process of looking for a job, but I was not anticipating the economy being this bad, and have only even managed to get one interview (yes, ONE interview in almost 9 months!!! T_T) so that is a bit out of my control. :( The "get a credit card" is also out of my control, because neither of us have credit history and so we CAN'T get a credit card and we don't really feel like freezing $5000 for a year. Argh. Maybe if I can find a job.
But we did finally start working on our Budget App, using MVC (which is cool) and NHibernate (which is cool but NHibernateRepository is causing problems, which is not cool).
I have also been studying for the MCTS, and am currently through chapter 11 so I should be taking the test by the end of next month, then I can go on to study the services book and the web app book as well. Then I can be a MCP too! ^_^
I have also been crafting a lot lately, making cool stuff for Syd's cube and for our new apartment which is love. <3 I recently made fish decals for the bathroom, and they are awesome. I am dying to do the study but I am going to have to order stuff from Amazon first. White walls get kinda boring after a while, and we don't even have any art or photos up yet (and last week I broke the only photo frame we had out! D:). Also I am knitting on a hoodie (Riding to Avalon by Connie Chang Chinchio, from Interweave's KnitScene, Fall 2008) for the SKC KAL...I really wanted to knit the Apres Surf Hoodie (same designer) but Elann.com is all out of the yarn I wanted to use in the color...and the original yarn is discontinued and I can't find the color I want in a yarn that I want (I don't want an all or mostly wool yarn because I do not want the Apres Surf Hoodie to be too hot).
There are so many things that I want to do but I just end up either not having the time to do or not having the money to do. It is kind of frustrating, actually. This mostly includes electronic projects from Make, Instructibles, and Switch Craft, but also includes anything that requires a sewing machine or button machine. :P
Yeah so I should stop wasting time and finish coloring in my shrinky dinks. Yep.
Coming later this week: Daring Baker's August Challenge! Which has yet to be baked! ^^'
Saturday, August 15, 2009
More seafood!
Well, I certainly seem to be on a seafood kick recently! Between pan-frying cornbread battered fish, making fish and spinach quesadillas, and the last daring cook's challenge of Skate with Traditional Flavors Powdered, I think I have eaten more seafood in the last two months than...well...in the entire rest of my life combined! o.0
Not that that is a bad thing. I really like seafood. :)
So this months daring cooks challenge is ALSO seafood. This time, cuttlefish (and once again, a kind of fish that is not easily accessible in the middle of the midwest)!
This month's daring cooks challenge was hosted by Olga of Las Cosas de Olga and Olga's Kitchen. She chose a Spanish dish called Rice with mushrooms, cuttlefish and artichokes by José Andrés, a well-known Spanish cook.
.jpg) Here's all of the ingredients..
Here's all of the ingredients..
So first I started the sofregit cooking. That wasn't too hard, just a couple of tomatoes (chopped), and onion (chopped), some garlic (chopped), bay leaves, and spices.
 Tomatoes and spices and onions oh yum!
While that was cooking away (and smelling mighty good!), I learned how to cut artichokes. I don't think I have ever EATEN artichoke before, much less cooked with it. So, that was definitely an experience.
.jpg) Interesting...
Interesting...
I need a better knife. And now I need to clean my kitchen, and I just cleaned today! D:
And then I de-stemmed and gilled the portobello mushrooms. I have never done that before either, but it was kind of fun. Mushroom gills are soft. ^_^
.jpg) Mushrooms!
Mushrooms!
Anyways, so then I took out the shrimp and ran half of it under cold water to thaw, removed the sofregit from the stove, and heated up olive oil and started cooking the shrimp.
And it was at this point that...my digital camera died. T_T Noooooooooooooo....So, sorry, no pictures of the finished dish. ^^'
Once the shrimp had been sitting in the oil for a bit, I threw in the mushrooms and artichoke hearts, and a couple of bay leaves, and sauteed that for a while.
Then, I added white wine, mixed that up for a bit, and then added the entire amount of sofregit. I didn't make a terribly large amount, to begin with...
After letting that sit for a bit, I added the water and brought that to a boil. Once it was really boiling, I added the rice, and boiled that for five minutes.
I substituted tumeric for saffron. I could actually find saffron, but I wasn't going to spend $16 on it, and I already had tumeric.
Then the rice boiled for another 8 minutes and sat until we decided to eat.
.jpg) Rice and shrimp!
Rice and shrimp!
I was going to make some delicious Spanish dessert to go with this, but I either didn't have the ingredients for things or my husband wasn't hungry for them. And I didn't really want to run to the store, so...no dessert. I'll have to make dessert another night. :P (I was debating between arroz con leche, which Syd doesn't really like but I do, churros, flan, and custard...sigh...but my milk went bad!)
Anyways, here is the official recipe, with my changes in italics.
Rice with mushrooms, cuttlefish and artichokesExcept I used shrimp instead
Cooking time: 45 minutes
Ingredients (serves 4):
As I was serving only 2, I made a half recipe, but it still served more than two :P
•4 Artichokes (you can use jarred or freezed if fresh are not available)
•12 Mushrooms (button or Portobello)
•1 or 2 Bay leaves (optional but highly recommended)
•1 glass of white wine
•2 Cuttlefish (you can use freezed cuttlefish or squid if you don’t find it fresh)or shrimp...seafood is hard to find in the midwest, and cuttlefish are too cute to eat anyways!
•“Sofregit” (see recipe below)
•300 gr (2 cups) Short grain rice (Spanish types Calasparra or Montsant are preferred, but you can choose any other short grain. This kind of rice absorbs flavor very well) – about 75 gr per person ( ½ cup per person) Please read this for more info on suitable rices.I used sushi rice because that was the only short-grained rice I could find
•Water or Fish Stock (use 1 ½ cup of liquid per ½ cup of rice)
•Saffron threads (if you can’t find it or afford to buy it, you can substitute it for turmeric or yellow coloring powder) I tok the tumeric option, saffron is too expensive
•Allioli (olive oil and garlic sauce, similar to mayonnaise sauce) - optionalOptional, so I didn't make this, I don't have a mortar and pestle...gosh, some people have everything!
Directions:
1.Cut the cuttlefish in little strips. Thaw the shrimp
2.Add 1 or 2 tablespoon of olive oil in a frying pan and put thecuttlefishshrimp in the pan.
3.If you use fresh artichokes, clean them as shown in the video in tip #7. Cut artichokes in eights.
4.Clean the mushrooms and cut them in fourths.
5.Add a bay leaf to thecuttlefishshrimp and add also the artichokes and the mushrooms.
6.Sauté until we get a golden color in the artichokes.
7.Put a touch of white wine so all the solids in the bottom of the get mixed, getting a more flavorful dish.
8.Add a couple or three tablespoons of sofregit or the whole batch of sofregit and mix to make sure everything gets impregnated with the sofregit.
9.Add all the liquid and bring it to boil.
10.Add all the rice. Let boil for about 5 minutes in heavy heat.
11.Add some saffron thread to enrich the dish with its flavor and color. Stir a little bit so the rice and the other ingredients get the entire flavor. If you’re using turmeric or yellow coloring, use only 1/4 teaspoon.
12.Turn to low heat and boil for another 8 minutes (or until rice is a little softer than “al dente”)
13.Put the pan away from heat and let the rice stand a couple of minutes.
Sofregit (a well cooked and fragrant sauce made of olive oil, tomatoes, garlic and onions, and may at times different vegetables such as peppers or mushrooms)
I also made a half-recipe of this
Cooking time: aprox. 1 hour
Ingredients:
•2 tablespoons of olive oil
•5 big red ripe tomatoes, chopped
•2 small onions, chopped
•1 green pepper, chopped (optional)
•4 or 5 garlic cloves, chopped
•1 cup of button or Portobello mushrooms, chopped (optional)
•1 Bay leaf
•Salt
•Touch of ground cumin
•Touch of dried oregano
Directions:
1.Put all the ingredients together in a frying pan and sauté slowly until all vegetables are soft.
2.Taste and salt if necessary (maybe it’s not!)
Because I did not make the optional part of this recipe, the Allioli, I am not including the recipes for that here.
Final Verdict
I have decided that I don't really like artichokes, and they taste kind of like cooked broccoli. Ew.
However, overall this dish was very good. I think it might have been better if I had been able to use fish stock, but I definitely liked it with the shrimp.
Syd thought it was good, too. =)
Not that that is a bad thing. I really like seafood. :)
So this months daring cooks challenge is ALSO seafood. This time, cuttlefish (and once again, a kind of fish that is not easily accessible in the middle of the midwest)!
This month's daring cooks challenge was hosted by Olga of Las Cosas de Olga and Olga's Kitchen. She chose a Spanish dish called Rice with mushrooms, cuttlefish and artichokes by José Andrés, a well-known Spanish cook.
.jpg) Here's all of the ingredients..
Here's all of the ingredients..So first I started the sofregit cooking. That wasn't too hard, just a couple of tomatoes (chopped), and onion (chopped), some garlic (chopped), bay leaves, and spices.
 Tomatoes and spices and onions oh yum!
While that was cooking away (and smelling mighty good!), I learned how to cut artichokes. I don't think I have ever EATEN artichoke before, much less cooked with it. So, that was definitely an experience.
.jpg) Interesting...
Interesting...I need a better knife. And now I need to clean my kitchen, and I just cleaned today! D:
And then I de-stemmed and gilled the portobello mushrooms. I have never done that before either, but it was kind of fun. Mushroom gills are soft. ^_^
.jpg) Mushrooms!
Mushrooms!Anyways, so then I took out the shrimp and ran half of it under cold water to thaw, removed the sofregit from the stove, and heated up olive oil and started cooking the shrimp.
And it was at this point that...my digital camera died. T_T Noooooooooooooo....So, sorry, no pictures of the finished dish. ^^'
Once the shrimp had been sitting in the oil for a bit, I threw in the mushrooms and artichoke hearts, and a couple of bay leaves, and sauteed that for a while.
Then, I added white wine, mixed that up for a bit, and then added the entire amount of sofregit. I didn't make a terribly large amount, to begin with...
After letting that sit for a bit, I added the water and brought that to a boil. Once it was really boiling, I added the rice, and boiled that for five minutes.
I substituted tumeric for saffron. I could actually find saffron, but I wasn't going to spend $16 on it, and I already had tumeric.
Then the rice boiled for another 8 minutes and sat until we decided to eat.
.jpg) Rice and shrimp!
Rice and shrimp!I was going to make some delicious Spanish dessert to go with this, but I either didn't have the ingredients for things or my husband wasn't hungry for them. And I didn't really want to run to the store, so...no dessert. I'll have to make dessert another night. :P (I was debating between arroz con leche, which Syd doesn't really like but I do, churros, flan, and custard...sigh...but my milk went bad!)
Anyways, here is the official recipe, with my changes in italics.
Rice with mushrooms, cuttlefish and artichokesExcept I used shrimp instead
Cooking time: 45 minutes
Ingredients (serves 4):
As I was serving only 2, I made a half recipe, but it still served more than two :P
•4 Artichokes (you can use jarred or freezed if fresh are not available)
•12 Mushrooms (button or Portobello)
•1 or 2 Bay leaves (optional but highly recommended)
•1 glass of white wine
•2 Cuttlefish (you can use freezed cuttlefish or squid if you don’t find it fresh)or shrimp...seafood is hard to find in the midwest, and cuttlefish are too cute to eat anyways!
•“Sofregit” (see recipe below)
•300 gr (2 cups) Short grain rice (Spanish types Calasparra or Montsant are preferred, but you can choose any other short grain. This kind of rice absorbs flavor very well) – about 75 gr per person ( ½ cup per person) Please read this for more info on suitable rices.I used sushi rice because that was the only short-grained rice I could find
•Water or Fish Stock (use 1 ½ cup of liquid per ½ cup of rice)
•Saffron threads (if you can’t find it or afford to buy it, you can substitute it for turmeric or yellow coloring powder) I tok the tumeric option, saffron is too expensive
•Allioli (olive oil and garlic sauce, similar to mayonnaise sauce) - optionalOptional, so I didn't make this, I don't have a mortar and pestle...gosh, some people have everything!
Directions:
1.Cut the cuttlefish in little strips. Thaw the shrimp
2.Add 1 or 2 tablespoon of olive oil in a frying pan and put the
3.If you use fresh artichokes, clean them as shown in the video in tip #7. Cut artichokes in eights.
4.Clean the mushrooms and cut them in fourths.
5.Add a bay leaf to the
6.Sauté until we get a golden color in the artichokes.
7.Put a touch of white wine so all the solids in the bottom of the get mixed, getting a more flavorful dish.
8.Add a couple or three tablespoons of sofregit or the whole batch of sofregit and mix to make sure everything gets impregnated with the sofregit.
9.Add all the liquid and bring it to boil.
10.Add all the rice. Let boil for about 5 minutes in heavy heat.
11.Add some saffron thread to enrich the dish with its flavor and color. Stir a little bit so the rice and the other ingredients get the entire flavor. If you’re using turmeric or yellow coloring, use only 1/4 teaspoon.
12.Turn to low heat and boil for another 8 minutes (or until rice is a little softer than “al dente”)
13.Put the pan away from heat and let the rice stand a couple of minutes.
Sofregit (a well cooked and fragrant sauce made of olive oil, tomatoes, garlic and onions, and may at times different vegetables such as peppers or mushrooms)
I also made a half-recipe of this
Cooking time: aprox. 1 hour
Ingredients:
•2 tablespoons of olive oil
•5 big red ripe tomatoes, chopped
•2 small onions, chopped
•
•4 or 5 garlic cloves, chopped
•
•1 Bay leaf
•Salt
•Touch of ground cumin
•Touch of dried oregano
Directions:
1.Put all the ingredients together in a frying pan and sauté slowly until all vegetables are soft.
2.Taste and salt if necessary (maybe it’s not!)
Because I did not make the optional part of this recipe, the Allioli, I am not including the recipes for that here.
Final Verdict
I have decided that I don't really like artichokes, and they taste kind of like cooked broccoli. Ew.
However, overall this dish was very good. I think it might have been better if I had been able to use fish stock, but I definitely liked it with the shrimp.
Syd thought it was good, too. =)
Friday, August 7, 2009
Geek Crafts
I am jobless. Still. So, being bored, I have started crafting things for my nice new apartment. I haven't gotten very far yet, but I am working on it and I have a few things "in the works" that I will share once they are finished.
Anyways, Syd wanted Mario magnets for his cube (after I made him tetris magnets), so he can "play" Mario during work. I looked into various options, but he wanted them small (so I couldn't needle point them on plastic canvas as I did the tetris magnets, and he thought the perler bead option would be too big as well, plus we don't have an iron anyways...need one, though) so I ended up making them out of shrinky dinks. And it took FOREVER. Even though they are small, coloring all of those pixles is kind of annoying. Cutting out the pixel edges is even worse. And then it took forever to find magnets that would fit on the back of the shrinky dinks and yet not be too strong that they would stick to the fridge rather than to the shrinky dinks (the shrinky dinks were not damaged, just the glue came off). But, anyways, here they are!

I am rather proud of this set.
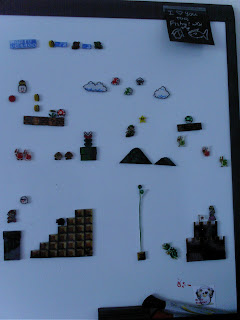
I totally want to make another one just for me.

Except it took me oooooh two months to make them. I don't think you could pay me to make another set. Even if you paid me! Which you can't. Because Mario is Copyright Nintendo, of course. Although tons of people do. :\ Am I missing something, or what?
Although, now I kind of want to make a smaller set for myself. Just the power ups. Or maybe just mario and peach and the fish...or...argh. Now I want one too! :P I also am contemplating making earrings and/or a bracelet.
So that was for husband's work..."work" haha. >.>
Anyways, for our nice new apartment I made...coasters! And, not just any coasters, no. STARGATE coasters!

And that was before I knew Think Geek had official Stargate coasters. Sigh. When I have a job, I will happily spend all of my paycheck at think geek. They also have SGC shirts. Yes, I love Stargate. <3 I wish it was real. :(

Anyways, those are not all of the projects I have lined up but I am on a budget (no job *sniff*) and I am also trying to study for the MCTS and do all of the housework and laundry so Syd doesn't have to. <3
Monday, July 27, 2009
Cookies!
The July Daring Bakers' challenge was hosted by Nicole at Sweet Tooth. She chose Chocolate Covered Marshmallow Cookies and Milan Cookies from pastry chef Gale Gand of the Food Network.
July Daring Bakers Challenge - Mallows and/or Milan Cookies
This month's challenge, hosted by Nicole of Sweet Tooth, was mallows and/or milan cookies, both recipes by Gale Gand of the Food Network.
I chose to make the mallows, as I thought both Mom and Syd would enjoy them. So this months challenge is a lesson in...how to bake when you don't have stuff. :P
 "Normal" butter and flour...
 Butter and gf-flour
I made one recipe of "normal" shortbread cookies for Syd, and one recipe of gf-shortbread cookies for Mom and me. Well, that isn't technically true. I actually made half recipes of each, because the recipe said one batch makes about two dozen cookies. So I made a half batch, and ended up with....way more than two dozen cookies per batch. Three-dozen circular cookies, four dozen (or so) heart cookies, AND half a dozen fishy cookies. Granted, I did use the 1" circular cutter rather than the 1 1/2" cutter, as that is what I had (the recipe called for a 1" or 1 1/2" cutter, by the way). And since I don't actually have a mixer, I "sanded" the butter and flour by hand. Once per batch. Ow.
 One batch of dough has been sanded...
 The second batch, sanded!
Awww aren't they so cute and little?
 Syd's cookies
 My crumbly cookies
The gf-dough was a little bit crumbly, it wanted to crack and fall apart, but somehow I made it work, and the cookies turned out fine. Syd liked them, anyways...>.>
The marshmallow insides could be made from scratch or you could just use store-bought marshmallows. I decided to *try* to make my own. I have tried before, with Mom (to make marshmallow peeps :P) but have always failed. Marshmallows are evil.
 Mmmmmmmmmmarshmaaaaaaaaaallows
But...I think these turned out okay. Which is surprising, because my old candy thermometer is messed up, and the new one didn't submerge all the way into the syrup. :(
And I used my little hand mixer for the marshmallows, I think it would have been easier with a large mixer. But they are so expensive. :\
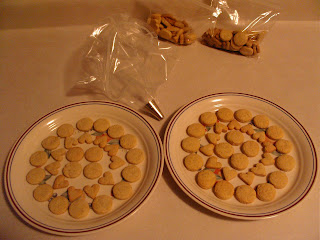 Cookies ready for marshmallows
I piped the marshmallows on the cookies with my pastry tip (which I bought to make churros but still haven't made XD) and a plastic bag (no, I don't have pastry bags or decorating bags or anything...siiiiiiiiiigh)...unfortunately, by the time I was on my second tray of cookies the marshmallows had gotten hard and I had trouble piping them out. And then I got a phone call that I had to take (not taking phone calls is NOT an option when you are looking for a job!!!) so then the marshmallows were even more stiff. I tried to save them so I will have homemade marshmallows that are not on the cookies, but the marshmallow goo may have been too set up already. We'll see..
 My cookies with marshmallows...
 Syd's marshmallow cookies..you can see the marshmallow started to set up while I was piping so these don't look as nice as mine.
Yay chocolate! I had a whole bunch of chocolate glaze leftover, even after glazing the cookies that didn't get marshmallow put on them!
 Cookie dripping with liquidy chocolate...
Of course, I did my cookies first to avoid contamination.
 My cookies, dipped
Then, I did Syd's. :)
 Syd's cookies, after dipping.
The recipe: With my notes/changes/etc in italics
Mallows(Chocolate Covered Marshmallow Cookies)
Recipe courtesy Gale Gand, from Food Network website
Prep Time: 10 min
Inactive Prep Time: 5 min
Cook Time: 10 min
Serves: about 2 dozen cookies if you say so...
• 3 cups (375grams/13.23oz) all purpose flour For gluten-free, I subsituted all-purpose gf flour in the same amount, plus 3 tsp Xanthan Gum
• 1/2 cup (112.5grams/3.97oz) white sugar
• 1/2 teaspoon salt
• 3/4 teaspoon baking powder
• 3/8 teaspoon baking soda
• 1/2 teaspoon ground cinnamon
• 12 tablespoons (170grams/ 6 oz) unsalted butter
• 3 eggs, whisked together If I made this again, I would add a little extra egg or water to the gf-recipe, it might help it stick together better
• Homemade marshmallows, recipe follows
• Chocolate glaze, recipe follows
1. In a mixer with the paddle attachment, blend the dry ingredients. or by hand..
2. On low speed, add the butter and mix until sandy. Still by hand...
3. Add the eggs and mix until combine. Whew!
4. Form the dough into a disk, wrap with clingfilm or parchment and refrigerate at least 1 hour and up to 3 days.
5. When ready to bake, grease a cookie sheet or line it with parchment paper or a silicon mat.
6. Preheat the oven to 375 degrees F.
7. Roll out the dough to 1/8-inch thickness, on a lightly floured surface. Use a 1 to 1 1/2 inches cookie cutter to cut out small rounds of dough.
8. Transfer to the prepared pan and bake for 10 minutes or until light golden brown. Let cool to room temperature.
9. Pipe a “kiss” of marshmallow onto each cookie. Let set at room temperature for 2 hours. Don't let your masrshmallows get too stiff. I wasn't sure if mine were going to set up at all, but I ended up waiting too long and it was really hard to pipe out the second half..
10. Line a cookie sheet with parchment or silicon mat.
11. One at a time, gently drop the marshmallow-topped cookies into the hot chocolate glaze. Don't leave them in too long or the marshmallow will melt!
12. Lift out with a fork and let excess chocolate drip back into the bowl. I used a chocolate fork, which is one thing I actually have. Well, kind of have. It's plastic, not metal :(
13. Place on the prepared pan and let set at room temperature until the coating is firm, about 1 to 2 hours.
Note: if you don’t want to make your own marshmallows, you can cut a large marshmallow in half and place on the cookie base. Heat in a preheated 350-degree oven to slump the marshmallow slightly, it will expand and brown a little. Let cool, then proceed with the chocolate dipping. But that is no fun!
Homemade marshmallows:I followed this pretty exactly
• 1/4 cup water
• 1/4 cup light corn syrup
• 3/4 cup (168.76 grams/5.95oz) sugar
• 1 tablespoon powdered gelatin
• 2 tablespoons cold water
• 2 egg whites , room temperature
• 1/4 teaspoon pure vanilla extract
1. In a saucepan, combine the water, corn syrup, and sugar, bring to a boil until “soft-ball” stage, or 235 degrees on a candy thermometer.
2. Sprinkle the gelatin over the cold water and let dissolve.
3. Remove the syrup from the heat, add the gelatin, and mix.
4. Whip the whites until soft peaks form and pour the syrup into the whites.
5. Add the vanilla and continue whipping until stiff.Don't recommend doing this with a hand mixer. It's not easy.
6. Transfer to a pastry bag. With a pretty tip!
Chocolate glaze:Yeah I didn't change this one either
• 12 ounces semisweet chocolate
• 2 ounces cocoa butter or vegetable oil
1. Melt the 2 ingredients together in the top of a double boiler Yay I have a double boiler! or a bowl set over barely simmering water.
Final Comments:
I couldn't get the chocolate to set up, despite following the recipe. So I ended up putting the cookies in the freezer. Hey..whatever.
Syd really liked his cookies.
I thought they were icky. However, Mom liked my cookies (she also eat gf), so..maybe it was just me. I didn't like the buttery shortbread (plus gf dough has a weird grainy texture) with the combination of the sweet marshmallow and the chocolate. Ew.
But they were pretty.
 Oooh, chocolatey oustide..
 ...marshmallowy cookie insides!
Friday, July 17, 2009
Illustration Friday, and stuff.
Illustration Friday! I actually did this week's promot! You can see it here. Not brilliant. Not even close to brilliant. But...better than nothing, and at least my people look relatively normal. Usually when I try to draw ballroom couples it just looks wrong. XD
Let's see...what else do I have to say?
I'm tired. I don't know what we are doing this weekend. I kind of don't want to do anything, because I'm tired of not feeling well. But I haven't felt well anyways the past three days so I don't know if it will make me feel that much worse.
Meh.
I really want to buy yarn and beads but I don't feel like I can afford it, so...I haven't. :(
Enough whining. I will go do something useful now. Meh.
Tuesday, July 14, 2009
Why do so many people hate seafood?
Seriously, I don't get it. About 90% of people I know HATE seafood. Won't TOUCH seafood. And here is the really odd thing. I love fish...but I HATE chicken. HATE it. I won't eat chicken to save my life. "Everybody" loves chicken, a good portion of "everybody" hate seafood, and I am exactly the opposite. Funny. Luckily, Syd likes fish. We have been eating a lot of fish lately, actually...
...annnnnnnnnd July's Daring Cook's Challenge?
Skate, with Traditional Powdered Flavors
This month's challenge was hosted by Sketchy of Sketchy's Kitchen. The recipe is from Grant Achatz, found in the Alinea cookbook.
Shockingly enough, there was nothing in this recipe that I couldn't have! However, I won't eat skate on principle (too close to sharks for me. Poor little sharkies!). And I don't think you can buy it around here anyways, so I am substituting cod.

The finished meal :)
Anyyyyyyyyyyyway, on to the notes:
In-progress Comments
I made four different powders. And I think I changed every recipe that was given! Each powder was a 50/50 (approx.) combination of two ingredients. In no particular order, they are: lemon/powdered sugar, spinach/parmesean cheese, oregano/cilantro, and onion/paprika.
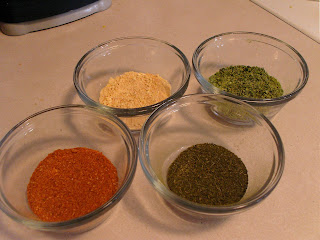
My Powders - Top Row, Left to Right: Lemon Powder, Spinach/Cheese powder. Bottom Row, Left to Right: Paprika/Onion powder, Cilantro/Parsely powder.
I got the idea for the onion/paprika powder from the Daring Cooks discussion boards, and I had a bunch of spinach on hand so I decided why not make a spinach powder, and looked up combinations online. The choice was between artichoke (didn't have), strawberry (a bit weird for me), and cheese, so I went with the cheese.
I actually didn't take a whole lot of pictures, oops. Partly because I wasn't sure how the powders were going to turn out, and partly I was just lazy. :P
I borrowed the coffee grinder from Mom, as I don't drink coffee and Syd doesn't drink enough to justify a grinder...and I got through making the first powder and realized that somehow I have lost my pastry brush (I *know* I had one!), *sigh*, so I had to go out and buy one. A cheap one. Moving is expensive. :'( Which partly explains some of the short cuts I took on this recipe.
Oh, I also completely skipped over the green beans. I had a, *ahem*, incident with Green Bean Almond Dean (luckily I was okay, almonds don't really seem to cause me problems like walnuts and pecans, but it scared me half to death) so now I am not eating green beans. Ever. Even if I cook them. Even if Mom cooks them. Even if I can guarantee they are 100% safe. They just don't look appetizing. So...yep.
And, finally, I thought the banana was weird so I made potato cakes with leftover mashed potatoes. Well, I tried, but I burned them so I ended up just making mashed potatoes. Sigh. And I forgot to buy banana chips (well, I am on a budget here :P) and I couldn't find cream powder and I didn't want to buy a whole big box of powdered milk that I will most likely never use again so I skipped that as well.
I decided to poach the fish in olive oil with herbs rather than in the beurre monte...it sounded better. I'm not a butter person. :P Also, I gave Syd three choices: the beurre monte, water & wine, or olive oil.

Olive oil, after the fish had been cooked (I don't know why I didn't take any pictures of the fish actually poaching o.0 Shame on me!), with rosemary, thyme, and a bay leaf
The fish did turn out really well, though.
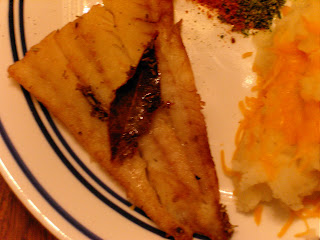
Finished, nicely browned fish...with the bay leaf on top. Syd thought it looked pretty this way. :P
Swirling the powders was a lot of fun. XD But maybe I am just really easily amused and still like to play with my food. :P

A heart <3

Syd's plate...I swirled the powders for him
Syd wanted to swirl powders, too...

My plate...husband swirled the powders for me
Gosh, for this actually being a recipe that I can technically eat, I change a lot of things! o.0 Oops.
The Recipe, With My Changes
My changes are either noted in italics or by strikethroughs, but I will leave the original recipe for those who read this blog who haven't tried this recipe...hahaha riiiight, nobody reads this. Except for people who follow the daring kitchen links. Who will have most likely already made it. :P
Skate, Traditional Flavors Powdered - with changes
•4 skate wings Substituted 4 cod fillets
•* Beurre monte poached in olive oil with herbs
•* 300g fresh green beans Currently not eating green beans!
•sea salt/kosher salt
•1 banana I ran out of bananas, and thought this sounded odd.
•454g butter - 4 sticksFor the beurre monte, which I did not make
•300g lemons
•1/2 Tbsp powdered sugar
•5g citric acid/vitamin c tablet Forgot about this ^^'
•150g cilantro
•150g parsley
•100g dried banana chips Forgot to buy these, and didn't feel like going back to the store. Also did not want to spend more money that I really had to.
•300g spray dried cream powder (or powdered milk) Could not find this, and did not want to buy large box of powdered milk
•100g cup mincedred onion
•1 tsp paprika
•200g capers (brined, not oil) Too expensive :'(
•300g cup spinach leaves
•1 Tbsp parmesean cheese
•Olive oil, enough for poaching
•thyme, rosemary, and a bay leaf
* For green beans, slice each beans into very thin rounds (2 mm)
* Beurre Monte - 454g butter (4 sticks, 1 pound) cubed and cold, 60g water. In a small saucepan, bring the water to a boil, remove from heat and whisk in the butter 1 cube at a time. This should from an emulsion. Keep this heated, but under 195 degrees. The emulsion will not break - this is your poaching liquid.
Powders - prepare ahead of time
caper / onion I made the onion powder but added paprika to it
lemon powder
cilantro/parsly powder
'brown butter' powder I did not make this
spinach/cheese powder I made this one up from scratch :P
once dried, all powders should be pulsed in a coffee grinder/spice mill/morter and pestle then passed through a chinois or fine mesh strainer.
citrus powder
300g lemons
1000g simple syrup
5g citric acid/vitamin c tablet
zest 300g of lemons (10.6 oz), remove the pith from the zest andpoach in the simple syrup three times(Note: I do not have a lemon zester, so I used a grater to remove the zest and the pieces were too fine to poach in the simple syrup because I do not have a strainer, and was not going to buy one for this purpose). dry with paper towels and move to a dehydrating tray. 130 for 12 hours. pulse the zest in a coffee grinder, pass through chinois, and mix with citric acid/vitamin C powder powdered sugar.
If you do not have a dehydrator, place in microwave for 8 to 10 minutes at medium powder. Once dried, follow the other instructions. Note: it probably took my microwave 15 minutes half power to dry the lemon zest...my microwave is pathetic.
cilantro/parsley powder
150g cilantro
150g parsley
blanch the parsley in boiling saltwater for 1 second, submerge the leaves in ice water for 3 minutes. Dry on paper towels and place on dehydrator tray. 130 for 12 hours. grind and pass through chinois.
If you do not have a dehydrator, place in microwave for 30 seconds, turn over leaves and microwave for another thirty seconds. They should be dry by now, pulse in coffee grinder, pass through chinois and reserve.
onion/paprika powder
100g cup minced red onions
1 tsp paprika
dehydrator - 130 for 12 hours
microwave at medium power for 20 minutes. Double the time for my microwave :'(
pulse in grinder, add paprika, pass through chinois
Caper powder I did not make this
200g capers (get the ones packed in brine/vinegar)
run the capers under cold water for two minutes to remove some of the brine.
dry on paper towels and dehydrate for 12 hours at 130 degrees.
microwave instructions are unclear. Dry them as much a possible with paper towels, the microwave on medium for 1 minute. Check the moisture content and stir them. repeat for 30 second intervals until they are dry. If you use this method, pleas post the time needed to dry the capers.
Once dry, pulse and sift the powder. Mix it with the onion powder.
Spinach/Cheese Powder I made this one up myself!
300 g spinach leaves
1 Tbsp parmesean cheese
Blanch the spinach in boiling saltwater for 30 seconds, drain, and place in ice water for 3 minutes. Pat dry.
Place in microwave, microwave at 30 second intervals (full power) twice, then for five minutes at half power, and then for 30 seconds at full power.
Place cheese in microwave, microwave for 5 minutes at half power.
Once dry, pulse both powders in grinder and mix together.
I do not have dehydrator instructions, as I do not have a dehydrator.
Brown Butter powder I did not make this either
100g Dried banana chips (unsweetened if possible - many are coated in honey - the freeze dried ones would be brilliant)
300g spray dried cream powder
If you cannot find the cream powder, you can substitute Bob's red mill non fat dry milk powder, or even carnation instant milk powder. The substitutions will alter the flavor a little, but you will still get the general idea.
preheat the oven to 350 degrees, sift the cream powder into a fine layer on a silpat or on parchment. bake for 4 minutes, then remove for heat. If it bakes for too long, it will burn. Be very cautious with all powders in the oven. They all go from browned to burnt in a few seconds.
grind the banana chips in a coffee grinder and mix with the toasted cream powder. Pass this through a chinois and reserve.
* For green beans, slice each beans into very thin rounds (2 mm)
* Beurre Monte - 454g butter (4 sticks, 1 pound) cubed and cold, 60g water. In a small saucepan, bring the water to a boil, remove from heat and whisk in the butter 1 cube at a time. This should from an emulsion. Keep this heated, but under 195 degrees. The emulsion will not break - this is your poaching liquid. I did not make either of these!
Skate Or cod :P
Prepare the skate - 50G v shaped cuts are recommended
Bring 100g water, 100g beurre monte, and green bean rounds to a boil over high heat. Cook until the water has evaporated (about 3 minutes), when the pan is almost dry, remove it from heat and season with 3g salt
bring 300g water and 300g beurre monte to simmer over medium heat, add skate wings and simmer for 2 minutes.
I replaced the above with:
Add a dash of rosemary and thyme to the olive oil. Add one bay leaf. Heat until herbs have a change to flavor the oil. Poach the fish for 4 minutes per side, flipping to poach both sides.
Remove the pan from heat and flip the wing over and let rest in pan for two more minutes. Transfer to warming tray lined with parchment and season with 5 grams of fine sea salt.
Plating
Take the tip of a small spoon and make a small mound of the citrus powder, the onion-caper powder, the spinach/cheese powder and the cilantro parsley-powder. Swirl these around in a hurricane type pattern. I found that it is easier, and you get finer lines if you lightly shake the plate to flatten out the mounds, then swirl the spoon through it to get the pattern.
peel the remaining banana into very think slices (3mm) fan three slices on the plate, place green beans on top and place skate wing portion on top. On the tall edge, sprinkle the brown butter powder.
My original idea was to replace the banana/green beans with potato cakes, but I accidentally burned those so we just had mashed potatoes on the side. Sigh.
The Final Comments...aka After Eating
So. I thought the powder concept was a bit weird, honestly. And I thought it gave a strange, dry texture to the whole thing as well. However, they did taste good. I really liked all of the powders except for the cilantro/parsley powder, which I felt didn't have enough flavor. The rest were really good.
I enjoyed swirling the powders into pretty designs, and the overall effect was very nice.
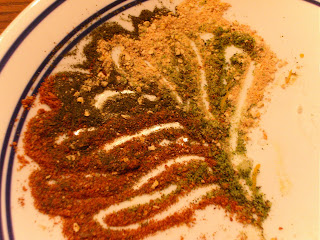
I did this after I was done eating...it's a flowery fern thingy.
So, an intriguing recipe that tasted better than I initially thought, and one that actually wasn't difficult to make. It took a while, but most of that time was spent waiting on my pathetic microwave to dry the ingredients enough that I could make the powders!
I ended up with lots of leftover powder, so I might use it up the next time we have fish.
My husband had only one thing to say after eating:

"YUM"
...annnnnnnnnd July's Daring Cook's Challenge?
Skate, with Traditional Powdered Flavors
This month's challenge was hosted by Sketchy of Sketchy's Kitchen. The recipe is from Grant Achatz, found in the Alinea cookbook.
Shockingly enough, there was nothing in this recipe that I couldn't have! However, I won't eat skate on principle (too close to sharks for me. Poor little sharkies!). And I don't think you can buy it around here anyways, so I am substituting cod.

The finished meal :)
Anyyyyyyyyyyyway, on to the notes:
In-progress Comments
I made four different powders. And I think I changed every recipe that was given! Each powder was a 50/50 (approx.) combination of two ingredients. In no particular order, they are: lemon/powdered sugar, spinach/parmesean cheese, oregano/cilantro, and onion/paprika.

My Powders - Top Row, Left to Right: Lemon Powder, Spinach/Cheese powder. Bottom Row, Left to Right: Paprika/Onion powder, Cilantro/Parsely powder.
I got the idea for the onion/paprika powder from the Daring Cooks discussion boards, and I had a bunch of spinach on hand so I decided why not make a spinach powder, and looked up combinations online. The choice was between artichoke (didn't have), strawberry (a bit weird for me), and cheese, so I went with the cheese.
I actually didn't take a whole lot of pictures, oops. Partly because I wasn't sure how the powders were going to turn out, and partly I was just lazy. :P
I borrowed the coffee grinder from Mom, as I don't drink coffee and Syd doesn't drink enough to justify a grinder...and I got through making the first powder and realized that somehow I have lost my pastry brush (I *know* I had one!), *sigh*, so I had to go out and buy one. A cheap one. Moving is expensive. :'( Which partly explains some of the short cuts I took on this recipe.
Oh, I also completely skipped over the green beans. I had a, *ahem*, incident with Green Bean Almond Dean (luckily I was okay, almonds don't really seem to cause me problems like walnuts and pecans, but it scared me half to death) so now I am not eating green beans. Ever. Even if I cook them. Even if Mom cooks them. Even if I can guarantee they are 100% safe. They just don't look appetizing. So...yep.
And, finally, I thought the banana was weird so I made potato cakes with leftover mashed potatoes. Well, I tried, but I burned them so I ended up just making mashed potatoes. Sigh. And I forgot to buy banana chips (well, I am on a budget here :P) and I couldn't find cream powder and I didn't want to buy a whole big box of powdered milk that I will most likely never use again so I skipped that as well.
I decided to poach the fish in olive oil with herbs rather than in the beurre monte...it sounded better. I'm not a butter person. :P Also, I gave Syd three choices: the beurre monte, water & wine, or olive oil.

Olive oil, after the fish had been cooked (I don't know why I didn't take any pictures of the fish actually poaching o.0 Shame on me!), with rosemary, thyme, and a bay leaf
The fish did turn out really well, though.

Finished, nicely browned fish...with the bay leaf on top. Syd thought it looked pretty this way. :P
Swirling the powders was a lot of fun. XD But maybe I am just really easily amused and still like to play with my food. :P

A heart <3

Syd's plate...I swirled the powders for him
Syd wanted to swirl powders, too...

My plate...husband swirled the powders for me
Gosh, for this actually being a recipe that I can technically eat, I change a lot of things! o.0 Oops.
The Recipe, With My Changes
My changes are either noted in italics or by strikethroughs, but I will leave the original recipe for those who read this blog who haven't tried this recipe...hahaha riiiight, nobody reads this. Except for people who follow the daring kitchen links. Who will have most likely already made it. :P
Skate, Traditional Flavors Powdered - with changes
•sea salt/kosher salt
•300g lemons
•1/2 Tbsp powdered sugar
•150g cilantro
•150g parsley
•100g cup minced
•1 tsp paprika
•300g cup spinach leaves
•1 Tbsp parmesean cheese
•Olive oil, enough for poaching
•thyme, rosemary, and a bay leaf
* For green beans, slice each beans into very thin rounds (2 mm)
* Beurre Monte - 454g butter (4 sticks, 1 pound) cubed and cold, 60g water. In a small saucepan, bring the water to a boil, remove from heat and whisk in the butter 1 cube at a time. This should from an emulsion. Keep this heated, but under 195 degrees. The emulsion will not break - this is your poaching liquid.
Powders - prepare ahead of time
caper / onion I made the onion powder but added paprika to it
lemon powder
cilantro/parsly powder
'brown butter' powder I did not make this
spinach/cheese powder I made this one up from scratch :P
once dried, all powders should be pulsed in a coffee grinder/spice mill/morter and pestle then passed through a chinois or fine mesh strainer.
citrus powder
300g lemons
zest 300g of lemons (10.6 oz), remove the pith from the zest and
If you do not have a dehydrator, place in microwave for 8 to 10 minutes at medium powder. Once dried, follow the other instructions. Note: it probably took my microwave 15 minutes half power to dry the lemon zest...my microwave is pathetic.
cilantro/parsley powder
150g cilantro
150g parsley
blanch the parsley in boiling saltwater for 1 second, submerge the leaves in ice water for 3 minutes. Dry on paper towels and place on dehydrator tray. 130 for 12 hours. grind and pass through chinois.
If you do not have a dehydrator, place in microwave for 30 seconds, turn over leaves and microwave for another thirty seconds. They should be dry by now, pulse in coffee grinder, pass through chinois and reserve.
onion/paprika powder
100g cup minced red onions
1 tsp paprika
dehydrator - 130 for 12 hours
microwave at medium power for 20 minutes. Double the time for my microwave :'(
pulse in grinder, add paprika, pass through chinois
Caper powder I did not make this
200g capers (get the ones packed in brine/vinegar)
run the capers under cold water for two minutes to remove some of the brine.
dry on paper towels and dehydrate for 12 hours at 130 degrees.
microwave instructions are unclear. Dry them as much a possible with paper towels, the microwave on medium for 1 minute. Check the moisture content and stir them. repeat for 30 second intervals until they are dry. If you use this method, pleas post the time needed to dry the capers.
Once dry, pulse and sift the powder. Mix it with the onion powder.
Spinach/Cheese Powder I made this one up myself!
300 g spinach leaves
1 Tbsp parmesean cheese
Blanch the spinach in boiling saltwater for 30 seconds, drain, and place in ice water for 3 minutes. Pat dry.
Place in microwave, microwave at 30 second intervals (full power) twice, then for five minutes at half power, and then for 30 seconds at full power.
Place cheese in microwave, microwave for 5 minutes at half power.
Once dry, pulse both powders in grinder and mix together.
I do not have dehydrator instructions, as I do not have a dehydrator.
Brown Butter powder I did not make this either
100g Dried banana chips (unsweetened if possible - many are coated in honey - the freeze dried ones would be brilliant)
300g spray dried cream powder
If you cannot find the cream powder, you can substitute Bob's red mill non fat dry milk powder, or even carnation instant milk powder. The substitutions will alter the flavor a little, but you will still get the general idea.
preheat the oven to 350 degrees, sift the cream powder into a fine layer on a silpat or on parchment. bake for 4 minutes, then remove for heat. If it bakes for too long, it will burn. Be very cautious with all powders in the oven. They all go from browned to burnt in a few seconds.
grind the banana chips in a coffee grinder and mix with the toasted cream powder. Pass this through a chinois and reserve.
* Beurre Monte - 454g butter (4 sticks, 1 pound) cubed and cold, 60g water. In a small saucepan, bring the water to a boil, remove from heat and whisk in the butter 1 cube at a time. This should from an emulsion. Keep this heated, but under 195 degrees. The emulsion will not break - this is your poaching liquid.
Skate Or cod :P
Prepare the skate - 50G v shaped cuts are recommended
bring 300g water and 300g beurre monte to simmer over medium heat, add skate wings and simmer for 2 minutes.
I replaced the above with:
Add a dash of rosemary and thyme to the olive oil. Add one bay leaf. Heat until herbs have a change to flavor the oil. Poach the fish for 4 minutes per side, flipping to poach both sides.
Remove the pan from heat and flip the wing over and let rest in pan for two more minutes. Transfer to warming tray lined with parchment and season with 5 grams of fine sea salt.
Plating
Take the tip of a small spoon and make a small mound of the citrus powder, the onion-caper powder, the spinach/cheese powder and the cilantro parsley-powder. Swirl these around in a hurricane type pattern. I found that it is easier, and you get finer lines if you lightly shake the plate to flatten out the mounds, then swirl the spoon through it to get the pattern.
My original idea was to replace the banana/green beans with potato cakes, but I accidentally burned those so we just had mashed potatoes on the side. Sigh.
The Final Comments...aka After Eating
So. I thought the powder concept was a bit weird, honestly. And I thought it gave a strange, dry texture to the whole thing as well. However, they did taste good. I really liked all of the powders except for the cilantro/parsley powder, which I felt didn't have enough flavor. The rest were really good.
I enjoyed swirling the powders into pretty designs, and the overall effect was very nice.

I did this after I was done eating...it's a flowery fern thingy.
So, an intriguing recipe that tasted better than I initially thought, and one that actually wasn't difficult to make. It took a while, but most of that time was spent waiting on my pathetic microwave to dry the ingredients enough that I could make the powders!
I ended up with lots of leftover powder, so I might use it up the next time we have fish.
My husband had only one thing to say after eating:

"YUM"
Monday, July 13, 2009
I hate allergies. :(
I really, really do.
It is so hard to go someplace knowing that going anywhere at all you are taking a risk.
For instance, whenever I go to my best friends' parents' house, I know that inevitably I am going to be miserable the next day, and 9 times out of 10 I am going to be miserable (sneezing, itchy eyes) while I am there. They live on a farm.
Knowing that, however, I can't always get out of going to their house.
Add on top of that the fact that I can't eat gluten. Usually they fix something like tacos, but not always, and then I am hungry AND miserable.
And then there are the things you don't even think about until it is too late. Irene has a sun conure, Pearl. The. most. annoying. bird. ever. A bird whose favorite food happens to be...cashews. >.< Having never owned a bird (allergies...ugh), I didn't even think about what the bird eats.
It is so weird, too...everyone else happily feeds Pearl cashews without even thinking about it, but to me cashews are as scary as...oh I don't even know what. But very, very scary. And to everyone else, it's just food. That is so weird.
Anyways, I'm going to go off and be miserably sneezy and get stuff done anyways.
Thursday, July 9, 2009
The joys of moving!
...no, seriously! I LOVE my new apartment. Absolutely. 100%. Well, except for the bathroom storage. That is lacking. But! Everything else is great. =)
And, now that I have this great place, I get to....decorate it! YAY! Of course, I have to decorate on a budget, sadly. At least until I get a job. Which may not be any time soon. Stupid economy. :'(
But I will eventually get around to posting pictures of the projects that I have done/am planning on doing. Yep. ^_^ Once everything is nice and tidy and put away (okay, most everything IS already put away, but still...the apartment is a *bit* empty. Well, totally empty. Furniture-speaking, at least. The closets are full of junk. I'm not sure why we have all of this stuff. o.0 And yet I'm not sure if there is anything that I want to actually get rid of! Terrible...*sigh* I am such a pack rat. :P
Also, I have determined that Syd and I need kitchen aprons. Syd has ruined at least two shirts now with oil, and I inevitably get something on myself (although I haven't ruined anything....yet). So sometime I will go to Michaels/JoAnn's/HobbyLobby/Crafts2000 and buy two plain aprons. With coupons. Or maybe I will just buy fabric and hijack my Mom's sewing machine. Not sure yet. Then I will airbrush them with pretty pictures! Yay!
I haven't done any projects for two weeks now, nor have I been to a craft store. Having withdrawl, but saving a little bit of money. Moving is, alas, expensive. :'(
Sometime I will get around to finishing my needle-felting. Maybe. And a couple of my knitting projects. And stuff. But for the moment I have been concentrating on a) putting stuff away, b) keeping stuff put away, and c) studying .NET programming skills which will (hopefully) give me the edge I need to get a job.
So maybe I will post some programming fun here once I finish what I am currently working on!
I still want to make a new blog layout. But alas, there are many other things that come first. Like a professional website. And ASP.NET programs. And studying for Microsoft Certification. And learning Flash programming. And working on XNA games. And stuff.
Sometime I should update my 101/1001 list. o.0
Oh! I'm working on a new poi move - behind the back weave. It's actually coming along quite nicely.
Okay, longer post than I was planning. Also, more rambling post than I was planning. :P Go figure. Oh well, you can't have it all, I guess! Yeah I should go finish dinner now.
Tuesday, June 16, 2009
Everything is a pudding!
The June Daring Bakers' challenge was hosted by Jasmine of Confessions of a Cardamom Addict and Annemarie of Ambrosia and Nectar. They chose a Traditional (UK) Bakewell Tart... er... pudding that was inspired by a rich baking history dating back to the 1800's in England.
June Daring Bakers' challenge - BlackwellTart Pudding
This month's challenge (and my FIRST! Daring Baker's challenge) - was co-hosted by Jasmine of Confessions of a Cardamom Addict and Annemarie of Ambrosia and Nectar. There were two mandatory parts. The first was the use of a sweet shortcrust pastry for the pastry tart. The second was frangipane.
I can't have either, at least not as given. Not that that is a huge surprise, however. :P I am the first to admit that I can't eat ANYTHING normal.
 Working on the crust...
Moving on. So I decided to make the sweet shortcrust pastry by substituting my standard gf-flour mix and an extra 1 tsp Xantham gum for the flour called by in the recipe. Easy enough!
 Finished Shortcrust
The frangipane posed a tougher challenge. Not only can I not have the flour, but I also cannot have the almonds. Hey, at least it didn't call for walnuts...
Through the Daring Bakers' Alternative Forum I found a link to Nutless Frangipane, and decided to try that.
 The Nutless Frangipane
I also decided to make mini tartless rather than one larger tart, because I couldn't choose between guava or apricot jam. So I made four little tartlets.
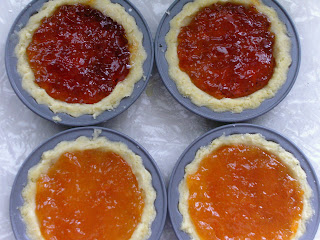 Mmmmmmmm jam...
I really have about four or five different jars of jam and jelly and preserves under the counter. I really don't know why, because I can't eat it on toast, and my husband doesn't eat toast. Hm. I guess I did make those jam-filled muffins once...
Here are the tartless ready to bake:
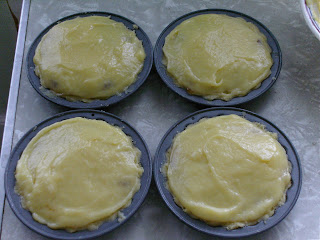 Uncooked
And here they are out of the oven:
 About 15-20 minutes later...a couple of them ended up sliiiiiiightly over done, but my oven is evil.
Apricot filling:
 These tasted so good!
And Guava filling:
 Note the drippiness of the filling...the taste was still great, they were just stickier!
Here is my modified version of the recipe:
Sweet shortcrust pastry
Prep time: 15-20 minutes
Resting time: 30 minutes (minimum)
1 cup gf flour mix
2 Tbsp sugar
½ tsp salt
1 stick unsalted butter, cold (frozen is better)
2 egg yolks
½ tsp almond extract Here I used imitation almond extract because I can have that...
1 Tbsp cold water
Sift together flour, sugar and salt. Grate butter into the flour mixture, using the large hole-side of a box grater. Using your finger tips only, and working very quickly, rub the fat into the flour until the mixture resembles bread crumbs. Set aside.
Lightly beat the egg yolks with the almond extract (if using) and quickly mix into the flour mixture. Keep mixing while dribbling in the water, only adding enough to form a cohesive and slightly sticky dough.
Form the dough into a disc, wrap in cling and refrigerate for at least 30 minutes
Nutless Frangipane
From Wookie Hut but I did change it some - changes are noted in italics. :)
Two parts:
Pastry Cream, aka Custard
1/2 cup milk
1/8 cup sugar
1/2 tsp imitation almond extract
1/2 Tbsp cornstarch
2 Tbsp sugar (again)
1 egg yolk
Heat milk and sugar on the stove. Meanwhile, mix cornstarch and sugar and whisk in egg yolk. When milk mixture is almost boiling, add it a little bit at a time to the egg mix (added to fast and it could cook the egg :P). Once all the milk has been added, stir in the extract and return mix to stove. Cook until the mixture thickens (just about when it starts to boil), and continue to cook for one minute. Remove from heat, transfer to bowl, cover with cling wrap and let cool. Place in fridge.
Flour Cream
4 Tbsp (1/2 stick) softened butter
2 Tbsp sugar
1/4 cup gf-flour
1 egg
Cream butter and sugar. Work in flour. Add egg until combined. Cover and place in fridge.
When ready, mix Pastry Cream and Flour Cream together (by hand). Keep in refrigerator until use.
Assembling the tart
I pressed the pastry into the tart pans, because the gf crust stuck to EVERYTHING no matter what I did. But gf crust is often like that. Chill in the freezer for 15 minutes.
Preheat oven to 400F.
Remove shell from freezer, spread as even a layer as you can of jam onto the pastry base. Top with nutless frangipane, spreading to cover the entire surface of the tart. Smooth the top and pop into the oven for 20 minutes. *note my oven is ummm difficult so baking time may differ greatly with your oven!*
The finished tart will have a golden crust and the frangipane will be tanned, poofy and a bit spongy-looking. Remove from the oven and cool on the counter. Serve warm, with crème fraîche, whipped cream or custard sauce if you wish.
Final Comments
Despite making a half batch of the nutless frangipane I still feel like I ended up with about twice the amount I actually needed. However, I did like it as a substitute for normal frangipane and thought it turned out well.
I may have overfilled the tarts slightly, but I like fruit. Apricot jam is yummy.
These remind me a lot of a traditional South African cookie, Jan Smuts' cookies. They also have a shortbready base, jam filling, and a gooey top, but the top is definitely not frangipane - no almonds invovled! And they are not made into a tart but rather use a muffin tin. The dough is cut out and/or pressed into the bottom of the muffin tin to form a shell, filled with jam (traditionally apricot) and then the top of the muffin tin is covered with the topping. Mmmmmmmmmmmmmmmm yummy.
These turned out really well. The apricot jam was great, but the guava jam went a little bit runny after baking. It still tasted so good but it did kind of run out of the tart and all over the plate, hands, and everything.
I will probably make these again sometime. They were fun and not terribly difficult or time consuming. And did I mention I like cookies filled with jam? :P
June Daring Bakers' challenge - Blackwell
This month's challenge (and my FIRST! Daring Baker's challenge) - was co-hosted by Jasmine of Confessions of a Cardamom Addict and Annemarie of Ambrosia and Nectar. There were two mandatory parts. The first was the use of a sweet shortcrust pastry for the pastry tart. The second was frangipane.
I can't have either, at least not as given. Not that that is a huge surprise, however. :P I am the first to admit that I can't eat ANYTHING normal.
 Working on the crust...
Moving on. So I decided to make the sweet shortcrust pastry by substituting my standard gf-flour mix and an extra 1 tsp Xantham gum for the flour called by in the recipe. Easy enough!
 Finished Shortcrust
The frangipane posed a tougher challenge. Not only can I not have the flour, but I also cannot have the almonds. Hey, at least it didn't call for walnuts...
Through the Daring Bakers' Alternative Forum I found a link to Nutless Frangipane, and decided to try that.
 The Nutless Frangipane
I also decided to make mini tartless rather than one larger tart, because I couldn't choose between guava or apricot jam. So I made four little tartlets.
 Mmmmmmmm jam...
I really have about four or five different jars of jam and jelly and preserves under the counter. I really don't know why, because I can't eat it on toast, and my husband doesn't eat toast. Hm. I guess I did make those jam-filled muffins once...
Here are the tartless ready to bake:
 Uncooked
And here they are out of the oven:
 About 15-20 minutes later...a couple of them ended up sliiiiiiightly over done, but my oven is evil.
Apricot filling:
 These tasted so good!
And Guava filling:
 Note the drippiness of the filling...the taste was still great, they were just stickier!
Here is my modified version of the recipe:
Sweet shortcrust pastry
Prep time: 15-20 minutes
Resting time: 30 minutes (minimum)
1 cup gf flour mix
2 Tbsp sugar
½ tsp salt
1 stick unsalted butter, cold (frozen is better)
2 egg yolks
½ tsp almond extract Here I used imitation almond extract because I can have that...
1 Tbsp cold water
Sift together flour, sugar and salt. Grate butter into the flour mixture, using the large hole-side of a box grater. Using your finger tips only, and working very quickly, rub the fat into the flour until the mixture resembles bread crumbs. Set aside.
Lightly beat the egg yolks with the almond extract (if using) and quickly mix into the flour mixture. Keep mixing while dribbling in the water, only adding enough to form a cohesive and slightly sticky dough.
Form the dough into a disc, wrap in cling and refrigerate for at least 30 minutes
Nutless Frangipane
From Wookie Hut but I did change it some - changes are noted in italics. :)
Two parts:
Pastry Cream, aka Custard
1/2 cup milk
1/8 cup sugar
1/2 tsp imitation almond extract
1/2 Tbsp cornstarch
2 Tbsp sugar (again)
1 egg yolk
Heat milk and sugar on the stove. Meanwhile, mix cornstarch and sugar and whisk in egg yolk. When milk mixture is almost boiling, add it a little bit at a time to the egg mix (added to fast and it could cook the egg :P). Once all the milk has been added, stir in the extract and return mix to stove. Cook until the mixture thickens (just about when it starts to boil), and continue to cook for one minute. Remove from heat, transfer to bowl, cover with cling wrap and let cool. Place in fridge.
Flour Cream
4 Tbsp (1/2 stick) softened butter
2 Tbsp sugar
1/4 cup gf-flour
1 egg
Cream butter and sugar. Work in flour. Add egg until combined. Cover and place in fridge.
When ready, mix Pastry Cream and Flour Cream together (by hand). Keep in refrigerator until use.
Assembling the tart
I pressed the pastry into the tart pans, because the gf crust stuck to EVERYTHING no matter what I did. But gf crust is often like that. Chill in the freezer for 15 minutes.
Preheat oven to 400F.
Remove shell from freezer, spread as even a layer as you can of jam onto the pastry base. Top with nutless frangipane, spreading to cover the entire surface of the tart. Smooth the top and pop into the oven for 20 minutes. *note my oven is ummm difficult so baking time may differ greatly with your oven!*
The finished tart will have a golden crust and the frangipane will be tanned, poofy and a bit spongy-looking. Remove from the oven and cool on the counter. Serve warm, with crème fraîche, whipped cream or custard sauce if you wish.
Final Comments
Despite making a half batch of the nutless frangipane I still feel like I ended up with about twice the amount I actually needed. However, I did like it as a substitute for normal frangipane and thought it turned out well.
I may have overfilled the tarts slightly, but I like fruit. Apricot jam is yummy.
These remind me a lot of a traditional South African cookie, Jan Smuts' cookies. They also have a shortbready base, jam filling, and a gooey top, but the top is definitely not frangipane - no almonds invovled! And they are not made into a tart but rather use a muffin tin. The dough is cut out and/or pressed into the bottom of the muffin tin to form a shell, filled with jam (traditionally apricot) and then the top of the muffin tin is covered with the topping. Mmmmmmmmmmmmmmmm yummy.
These turned out really well. The apricot jam was great, but the guava jam went a little bit runny after baking. It still tasted so good but it did kind of run out of the tart and all over the plate, hands, and everything.
I will probably make these again sometime. They were fun and not terribly difficult or time consuming. And did I mention I like cookies filled with jam? :P
Subscribe to:
Comments (Atom)